
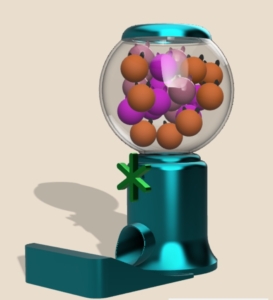
Fusion360でお花を作ってみました
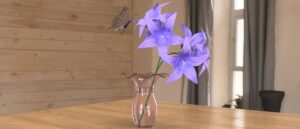
わたしはよくFusion360でお花をつくっています。初めてつくったお花はこちら

はじめてはこれでも「おぉ~!できた!!」と感動したものです
そこから1年くらい、色々試行錯誤を重ねて自分の中での手順がだいぶ固まってきたかな、と思うので
紹介したいと思います!
まず、最初にわたしがお花づくりを始めたときに参考にした動画を紹介します。
いそぷろさんのモデリング動画
とてもわかりやすい!!
動画で解説してくれてとてもありがたい!!
こちらがベースになっています。最初は動画を何度も見返しながら作っていましたが、
自分の中に手順がしみ込んできたかな、と感じています。
今回は最近作った「ゼフィランサス」を例にして作り方を紹介します。
それではいってみましょう!
作成手順
①お花を選び、調べる
まず、つくるお花を選びます。好きなものがあればそれで。わたしは大体「その日や月の誕生花」などです。
お花も作りやすいもの・作りにくいものがあるので、作りやすいお花を選ぶのであれば
- 花びらがあまり多くない(多すぎるとデータが重くなるので)
- おしべ、めしべが多すぎない(データが略)
- あまりたくさん密集して咲くものではない(デー略)
ということを意識するといいかなと思います。
でもやっぱり、すきという気持ちが一番だいじ
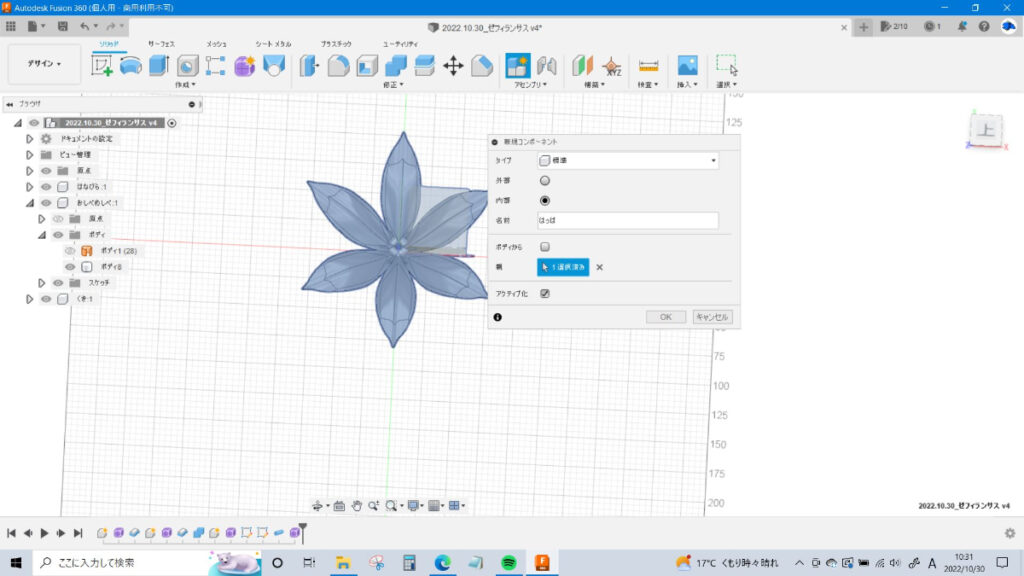
② 花びらー新規コンポーネントをつくる
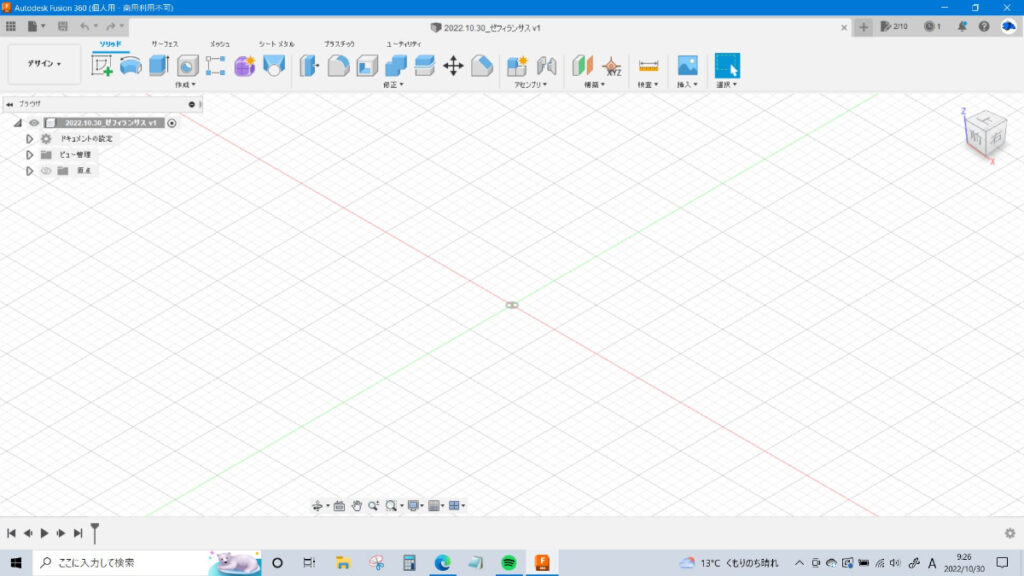
新規ファイルを作り、後で増やしたり色を塗ったりする都合上パーツ分けしておいた方が便利なので
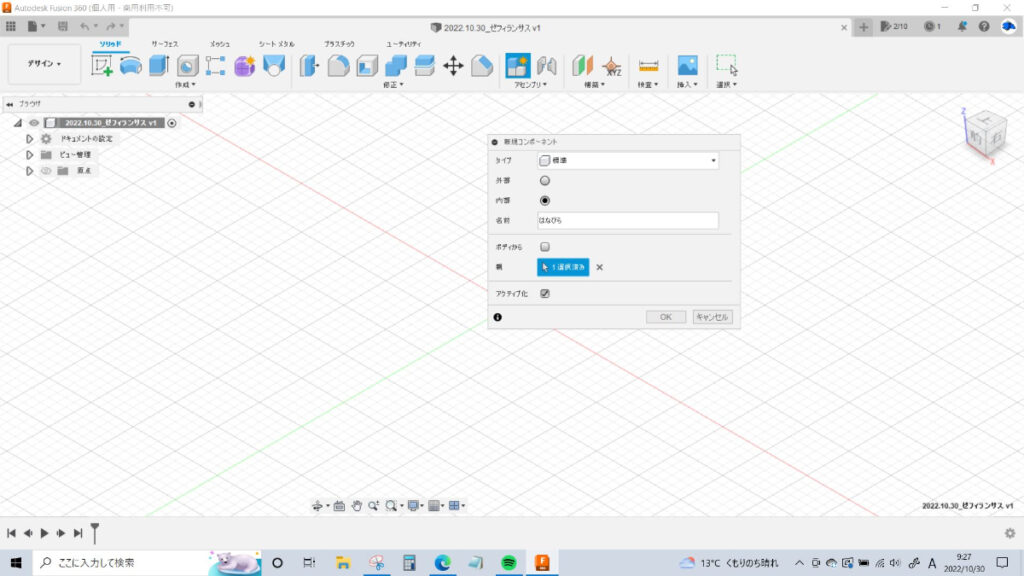
パーツごとに新規コンポーネントをつくっていきます。
わたしは花びらから作っていくので、名前は「花びら」としておきます。
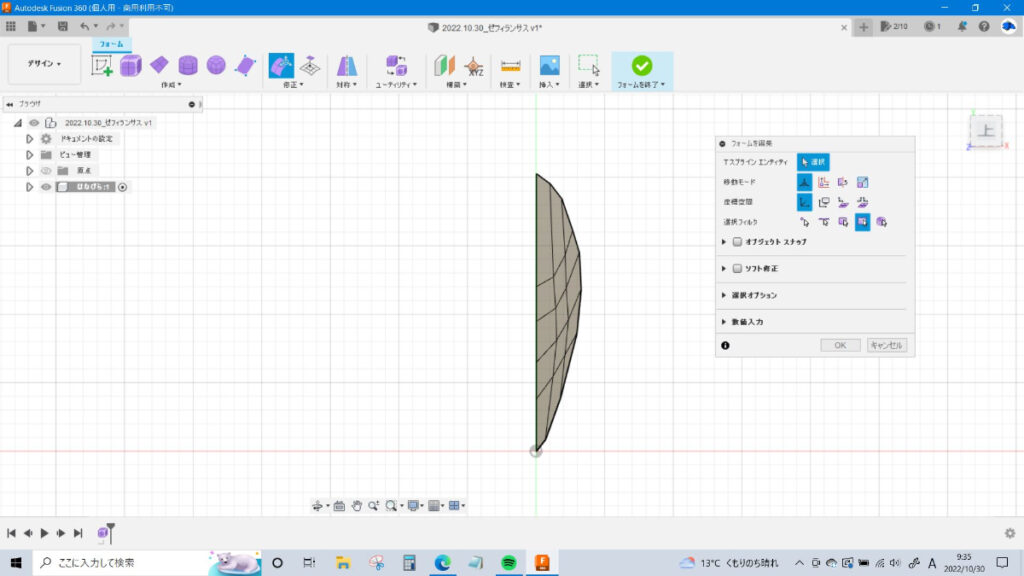
②-1 フォームで平面をつくる
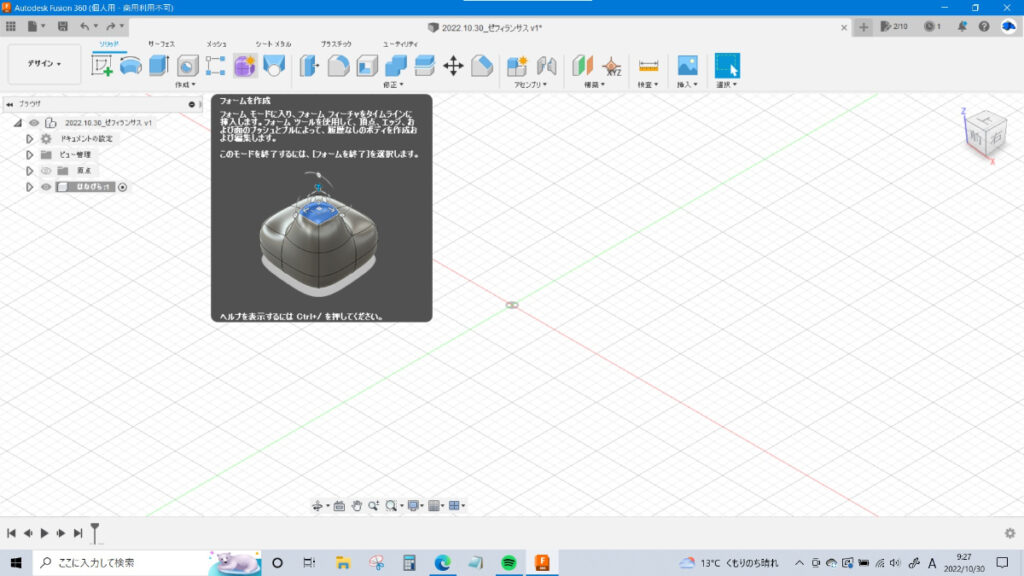
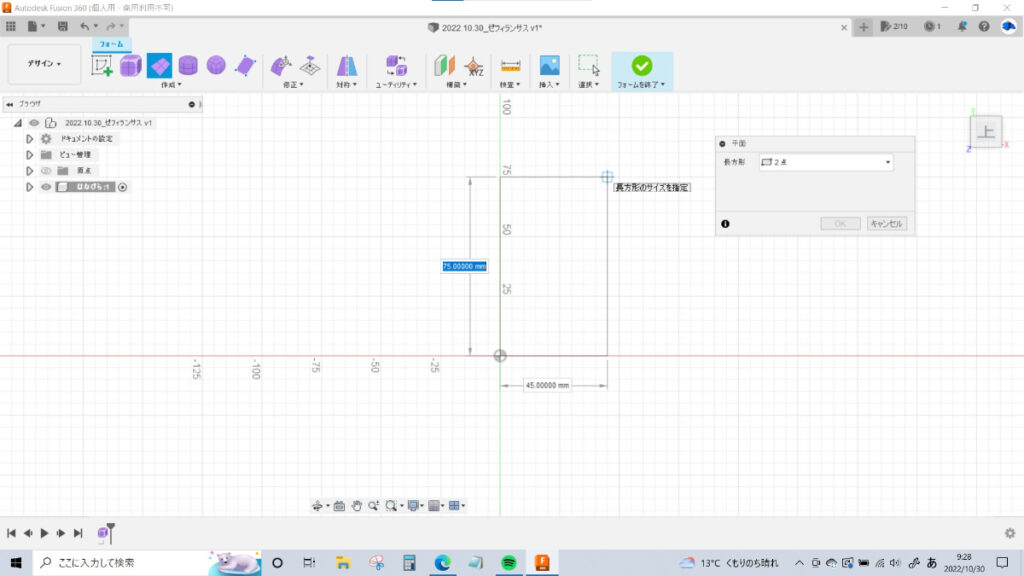
ソリッドのタブで「フォーム」を選び、花びらを作りたい面(ここではXY平面)を選択します。
後でミラーでをYZ平面に対称なコピーを作るので、
「2点」を選んで原点から右上(または左上)方向に面を作ります。
②-2 面の分割数を決め、ボックス表示にする
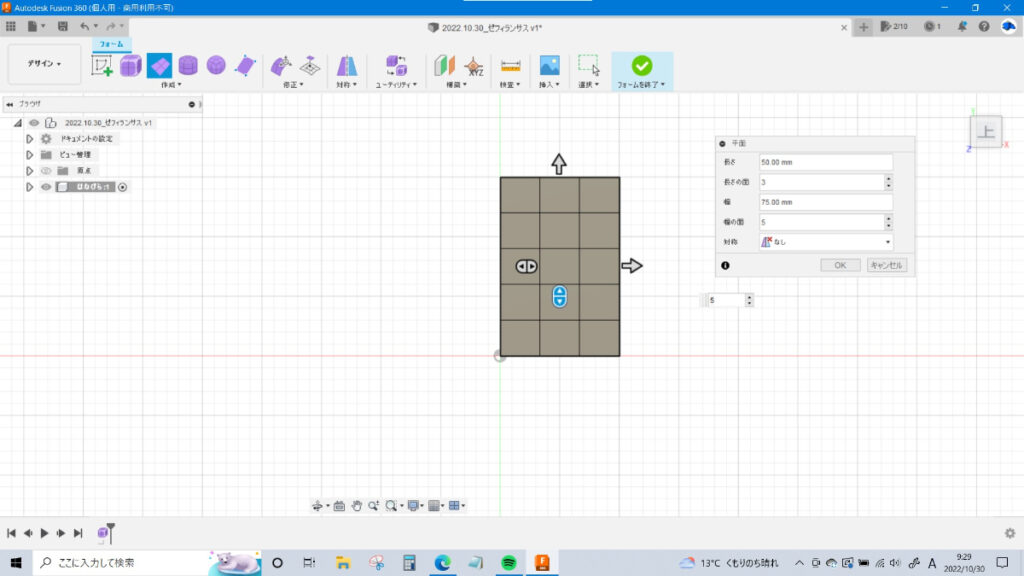

面の分割数を決めます。細かいほど編集がめんd…大変になるけど、滑らかな面が作れます。
基本的には、平べったい花びらの場合は分割数少なめで大丈夫。
反り返っているような形状の花びらの場合は分割数を増やすとよいと思います。
今回はヨコ3×タテ5でいきます。
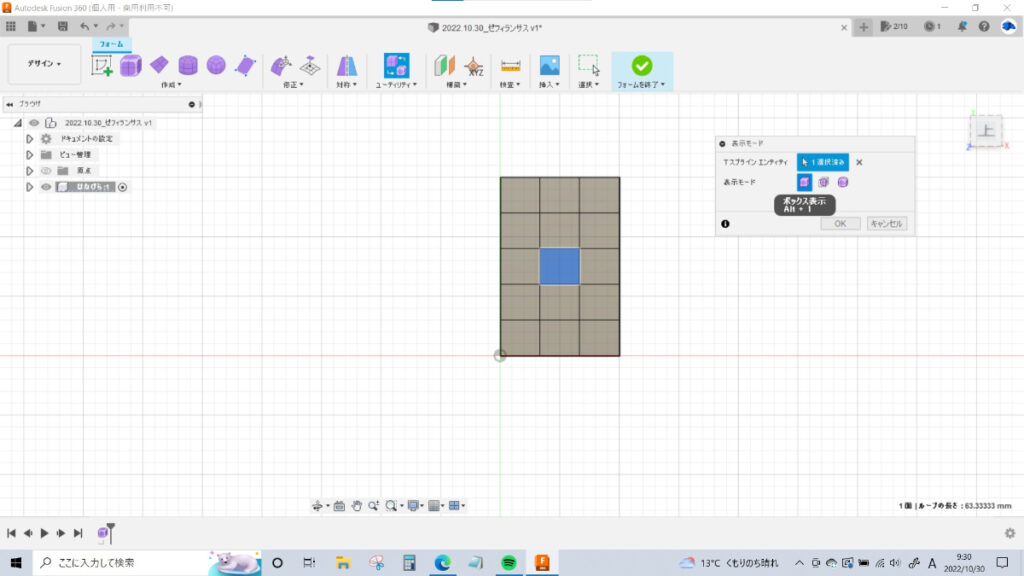
デフォルトでなめらかな面に見える「スムーズ表示」になっていますが、トポロジーを整えにくいので
カクカクとした面として見える「ボックス表示」に切り替えておきます。(面を選択してAlt+1でもOK)
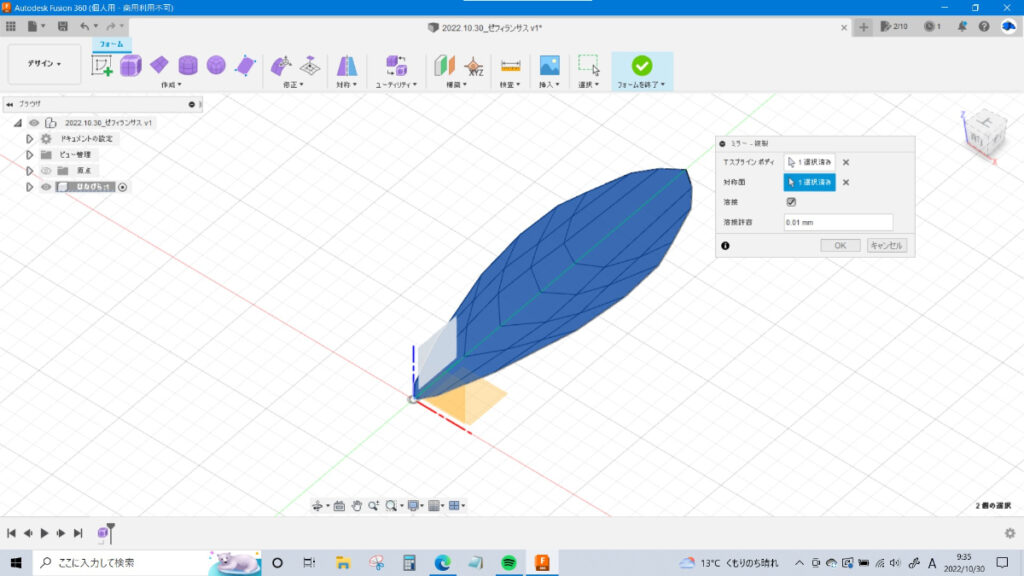
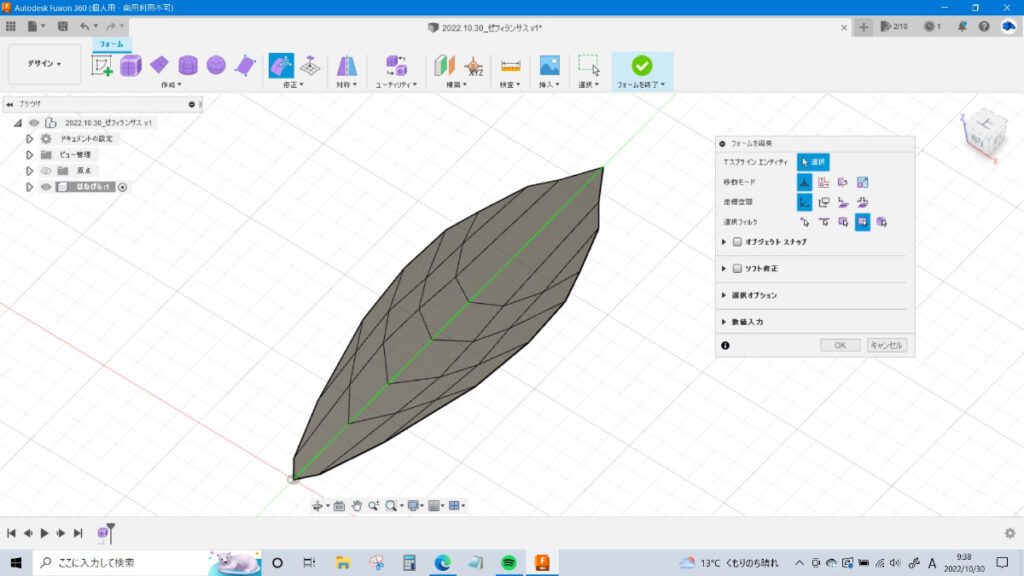
②-3 形を整えて不要な頂点を削除し、YZ平面に対象に複写する

さらっと書いてしまいましたが、ここが一番キモとなるポイントのひとつ(いくつかあります)
お花の写真を見ながら、花びらの形に近づけていきます。まだ平面的でOK。
まぁまぁ近づいてきたかな、と思ったら「ミラー 複製」でYZ平面に対象に複写します。
対称がついているので、頂点や辺・面を編集すると対応する部分も一緒に動くので便利です。
なめらかに見える「スムース表示」(Alt+3)と切り替えながらきれいな形にしていきます。
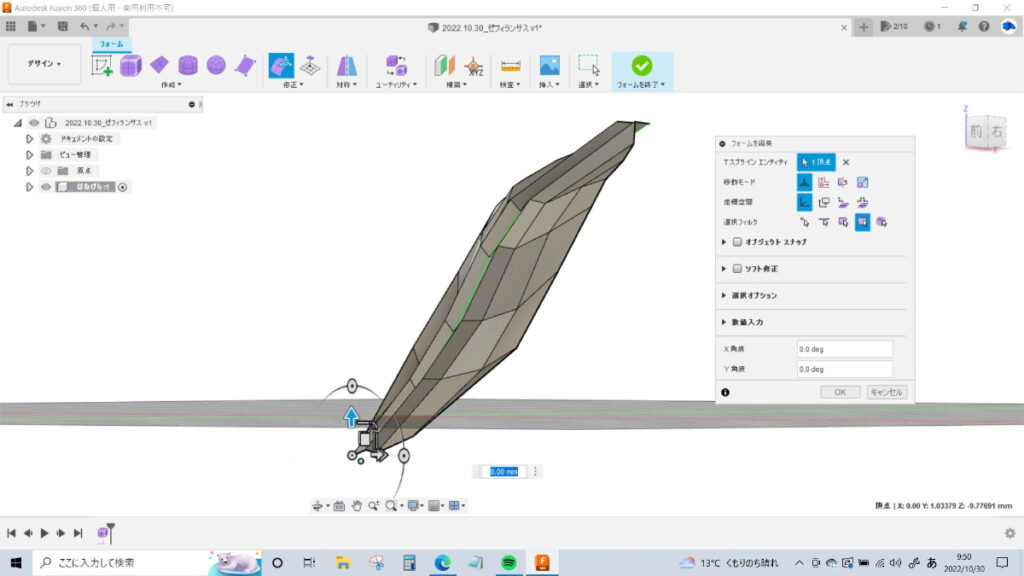
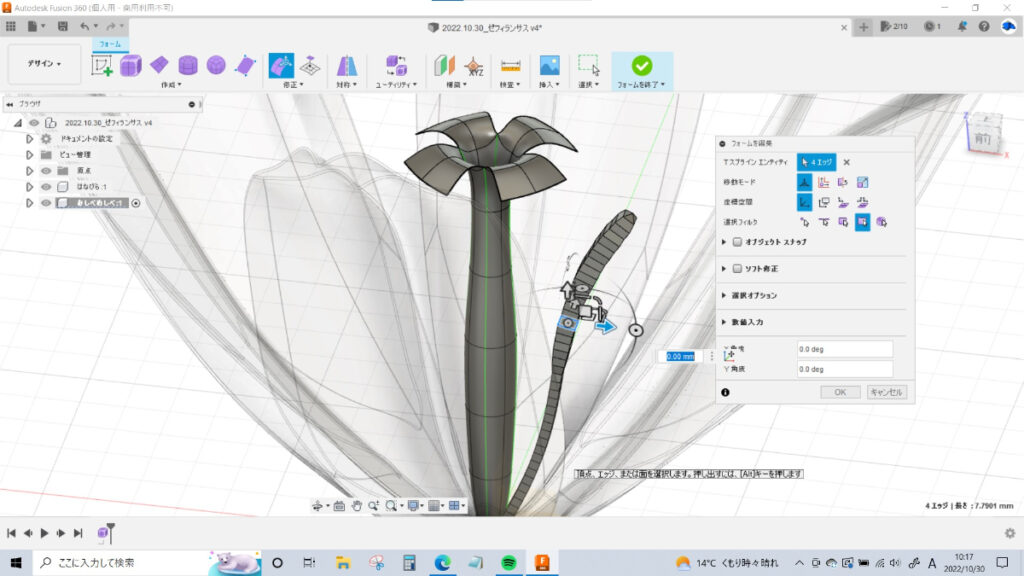
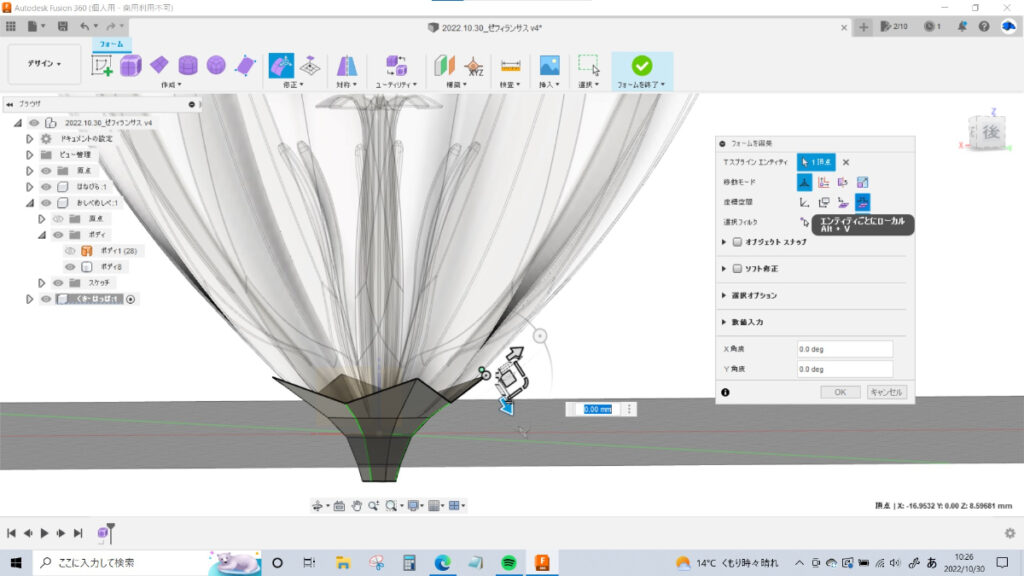
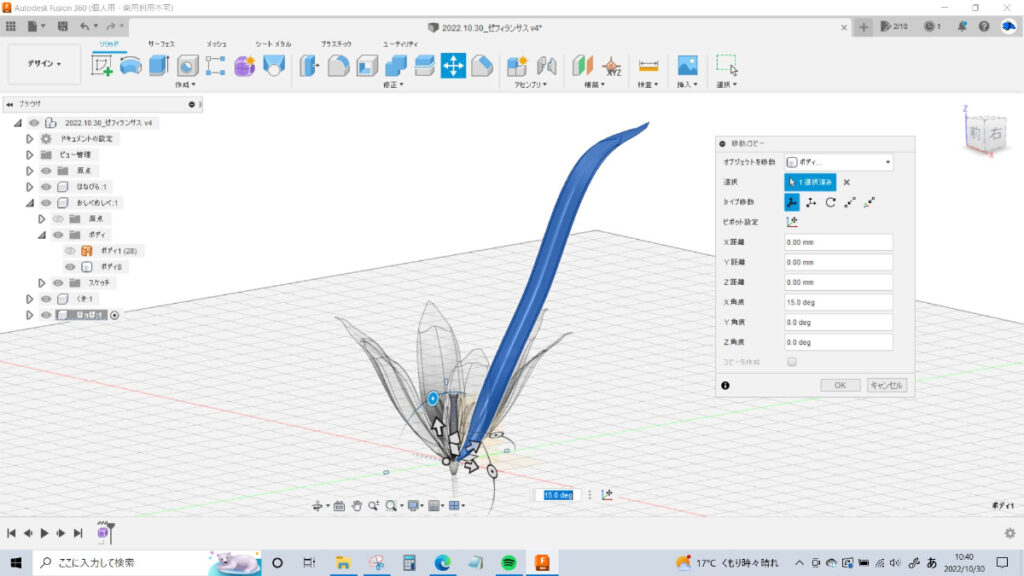
②-4 花びらを立ち上げて立体的にしていく
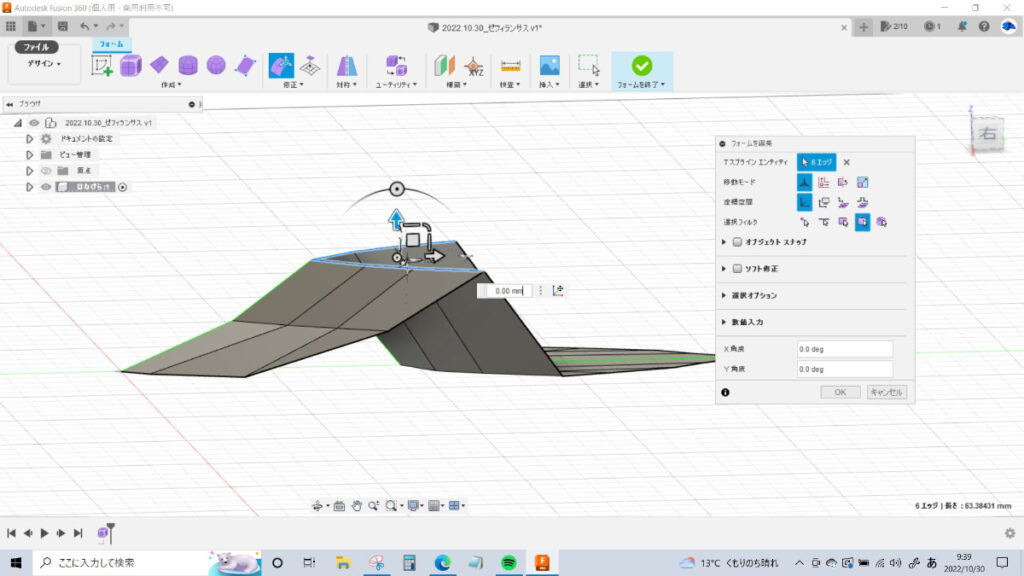
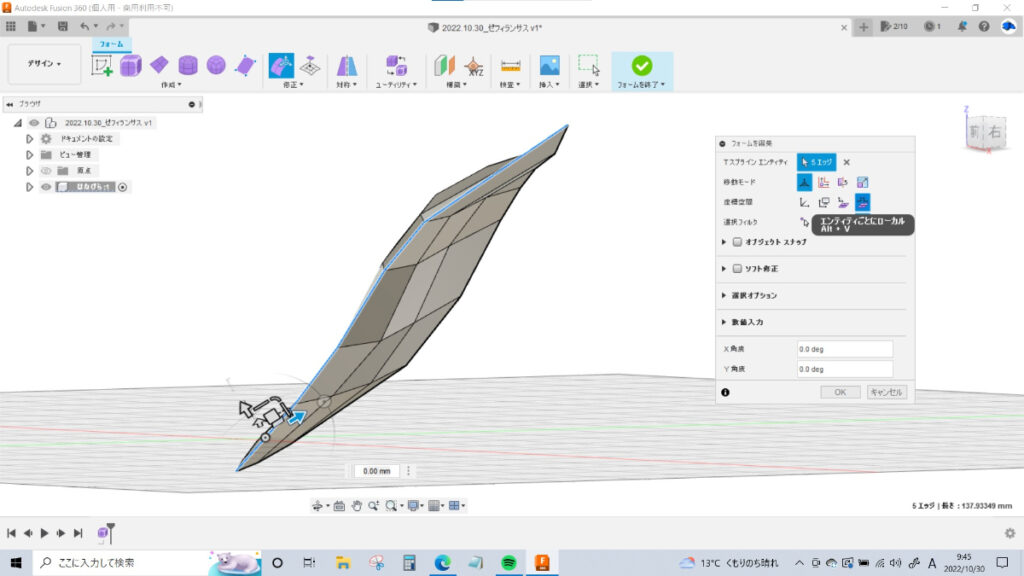
キモとなるポイント2つめ、花びらに立体的なカーブをつけていきます。
わたしはあまり使わないのですが「ソフト修正」などの機能も上手く使えると編集がラクになると思います。
「座標空間」のワールド/エンティティごとにローカル
「選択フィルタ」の点/辺/すべて なども切り替えつつ、ひたすらイメージに近くなるように編集していきます。
感覚的な説明になりますが、ここはやってみて慣れるしかないかな…。
②-5 ベベルエッジを挿入し、いい感じの筋をつける

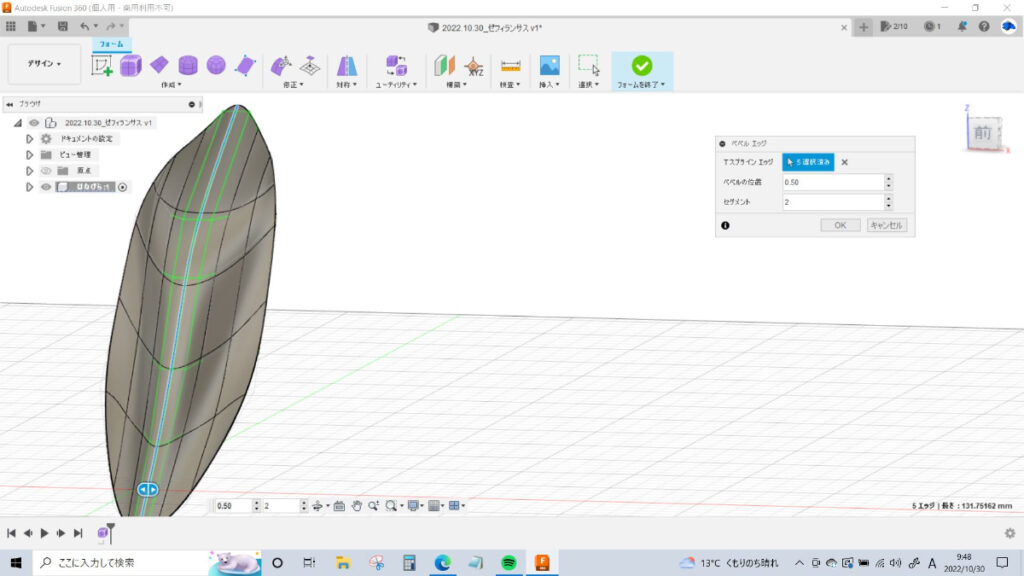
形が出来てきたら、対象の中心になっている辺を選択して「ベベルエッジ」を挿入します。
セグメント数は「2」にしています。(じつは他の数にするとどうなるのかよくわかっていない)
すると両側に1本ずつ辺が追加されるので、持ち上げたりへこませたりすると「それっぽい」筋がつきます。
②-6 「ボディの修復」を行う

必死に編集しても、トポロジーにアウトなところがあるとソリッドに変換できないので
おかしなところがないか「ユーティリティ」の「ボディの修復」を行います。
上から2番目の「自動修復」を選ぶと、辺が集中しすぎている点を修正してくれたりします。
これでひとまず花びらが1枚できました!
修復は編集中もちょこちょことやった方がいいのですが
ついつい忘れちゃう
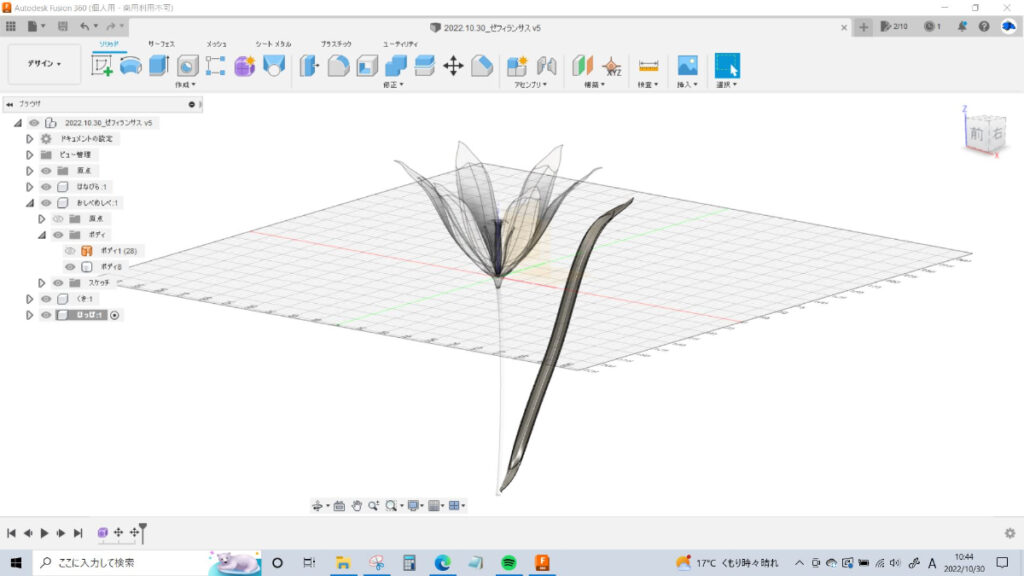
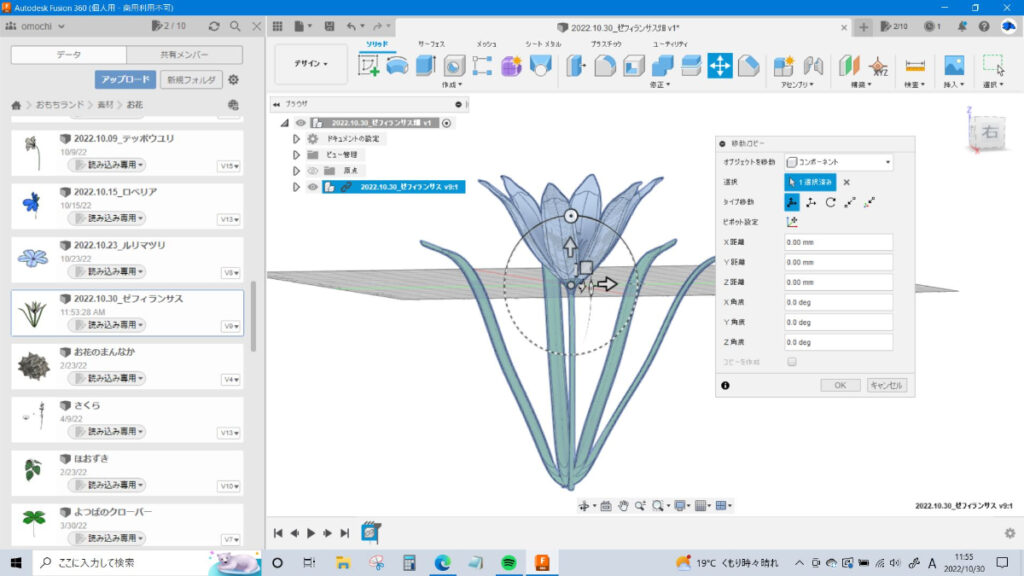
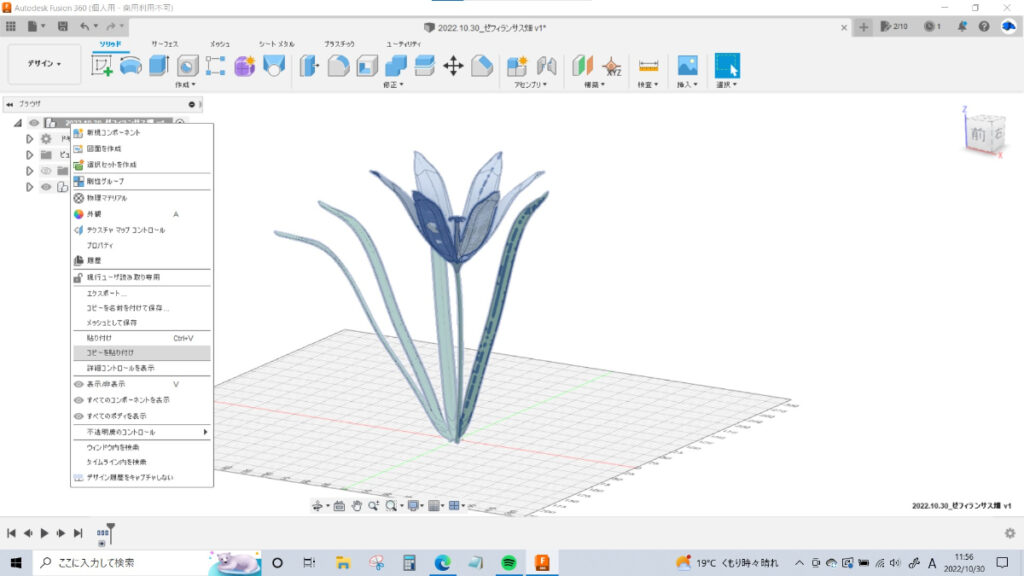
②-7 位置を調整しつつ複写で数を増やす
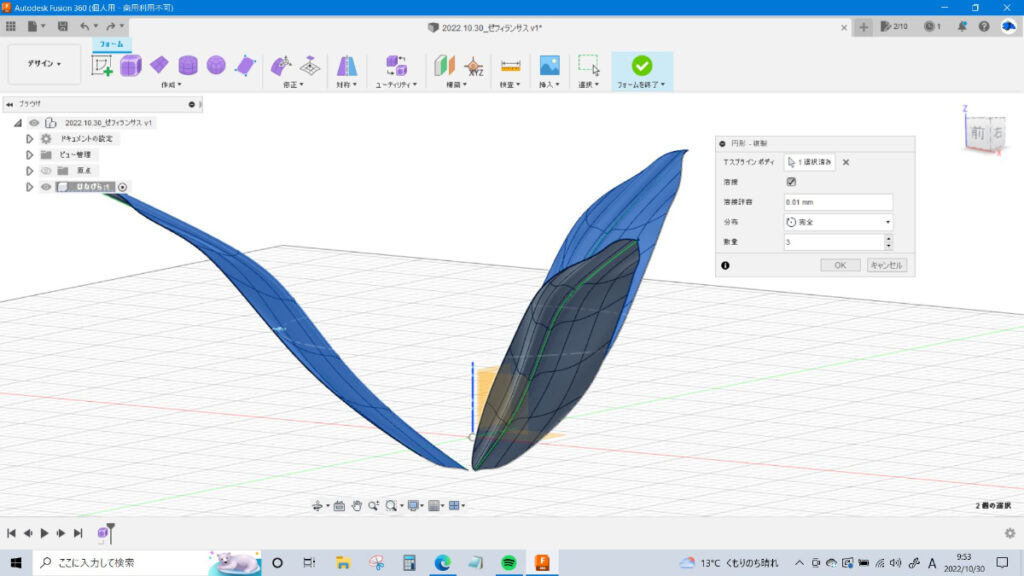

1枚の花びらを増やしていきます。今回は3枚セットの花びらが2層になっているような形のお花なので
円形複写で3枚にする×2回で作っていきます。
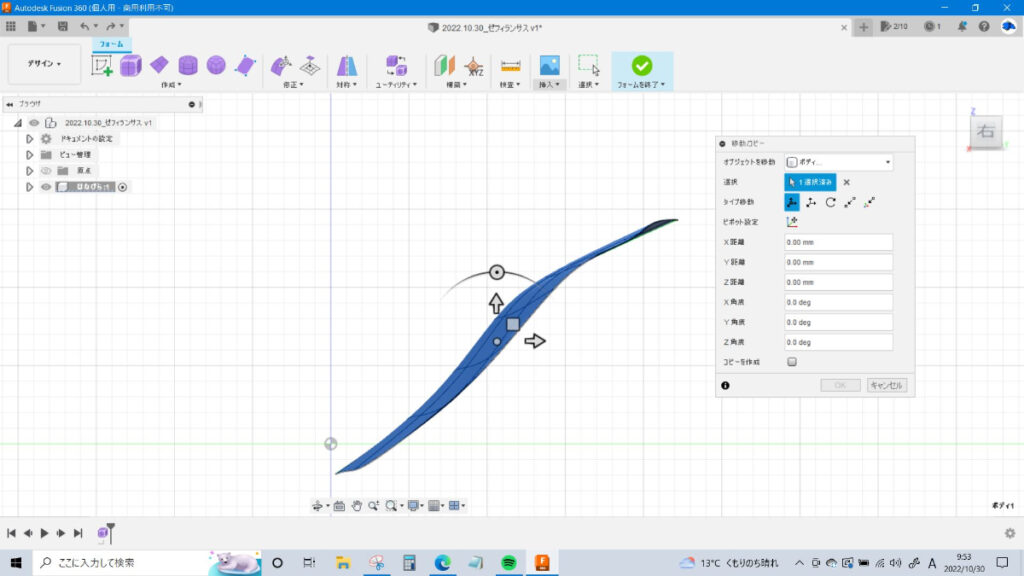
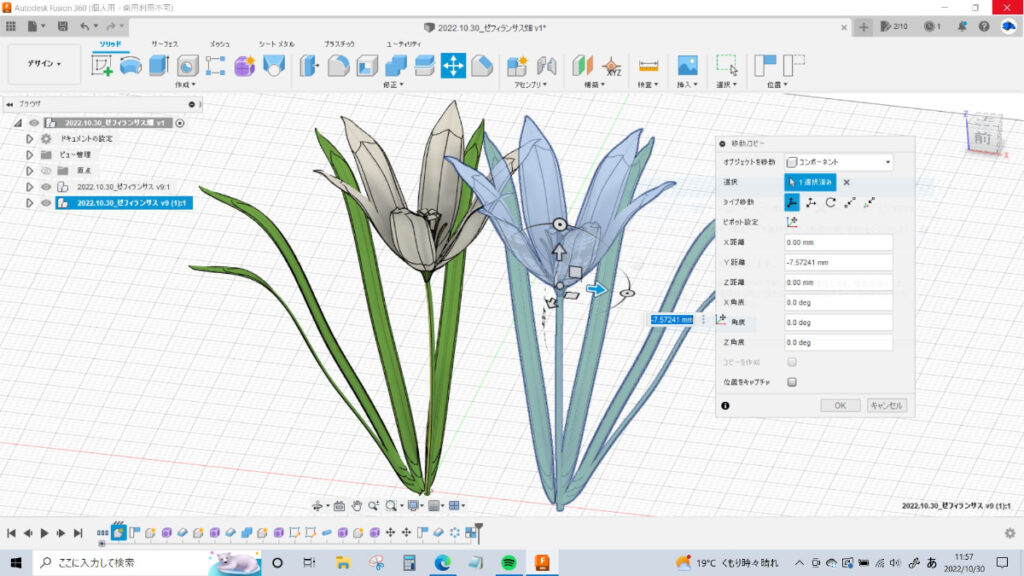
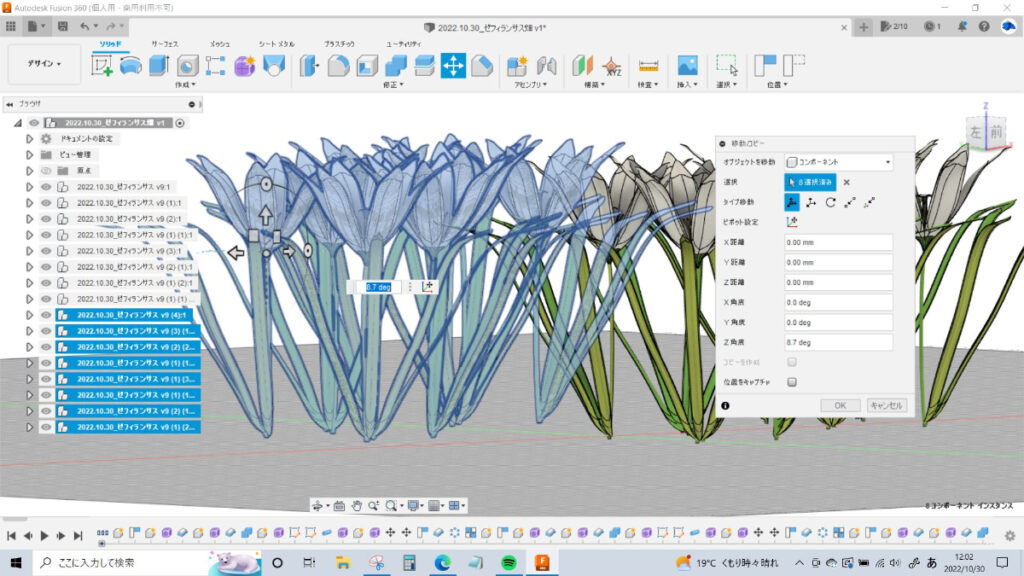
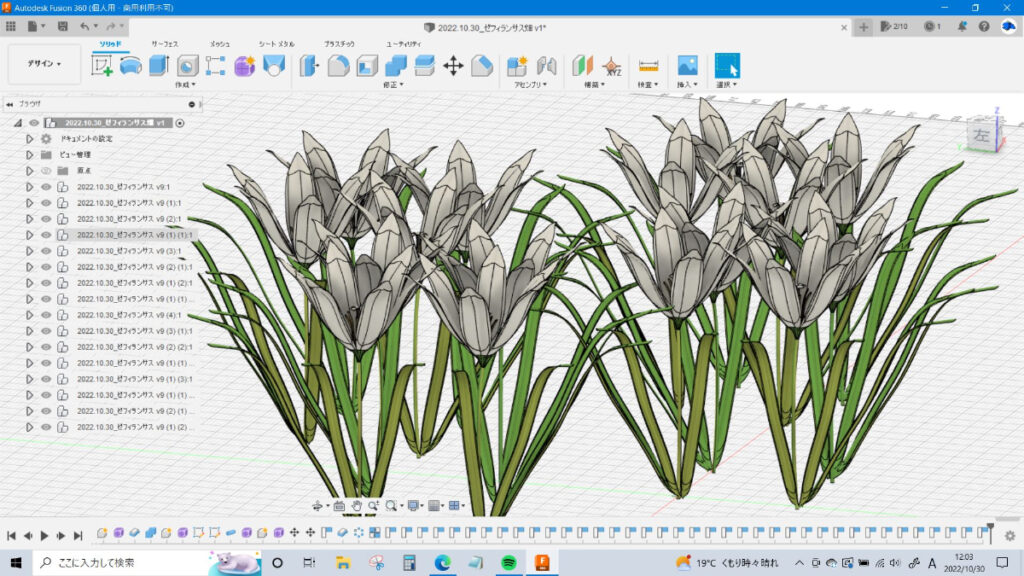
複雑に重なり合った花びらは移動コピーで微調整しつつ増やしますが
結構大変です(今回は割愛)
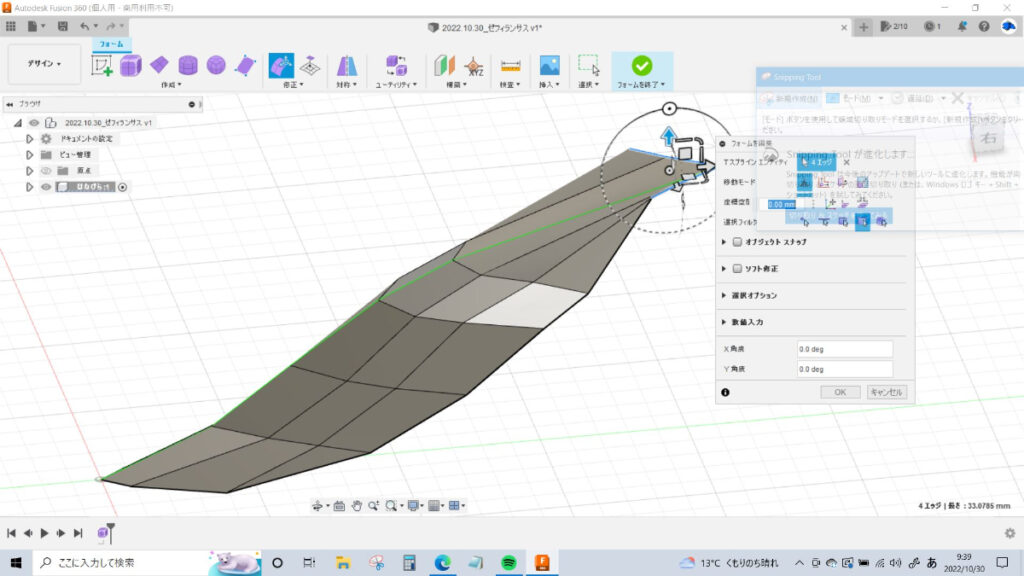
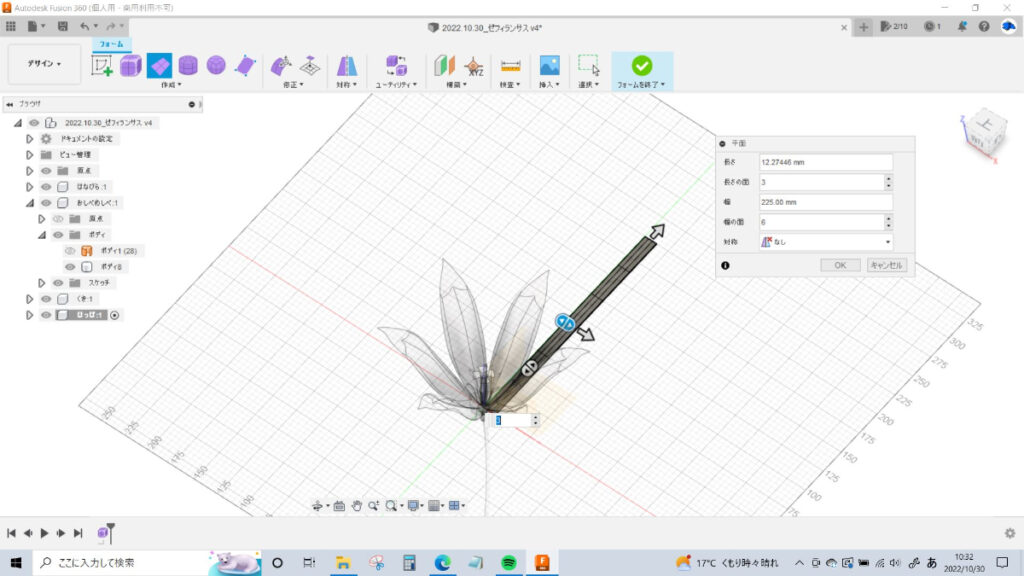
画像1枚目:増やしてみたら、結構スキマが開いていた&花びらの角度が平たすぎた
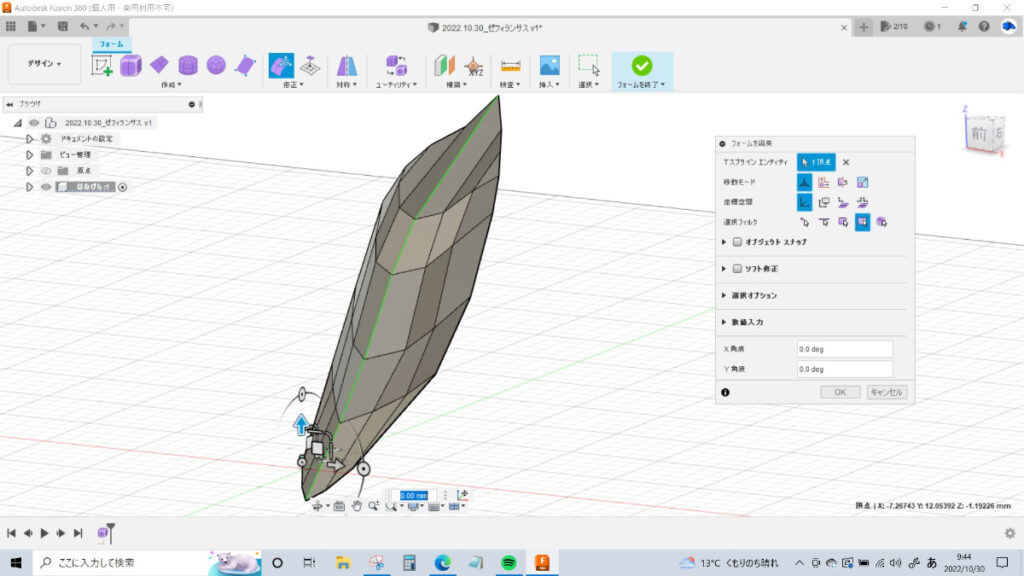
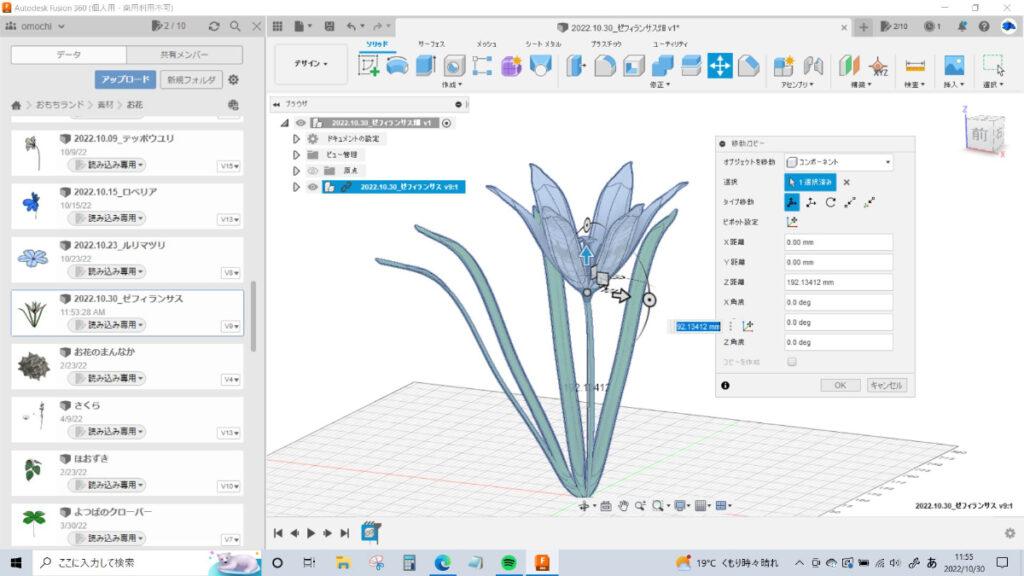
画像2枚目:移動で位置と角度を調整する
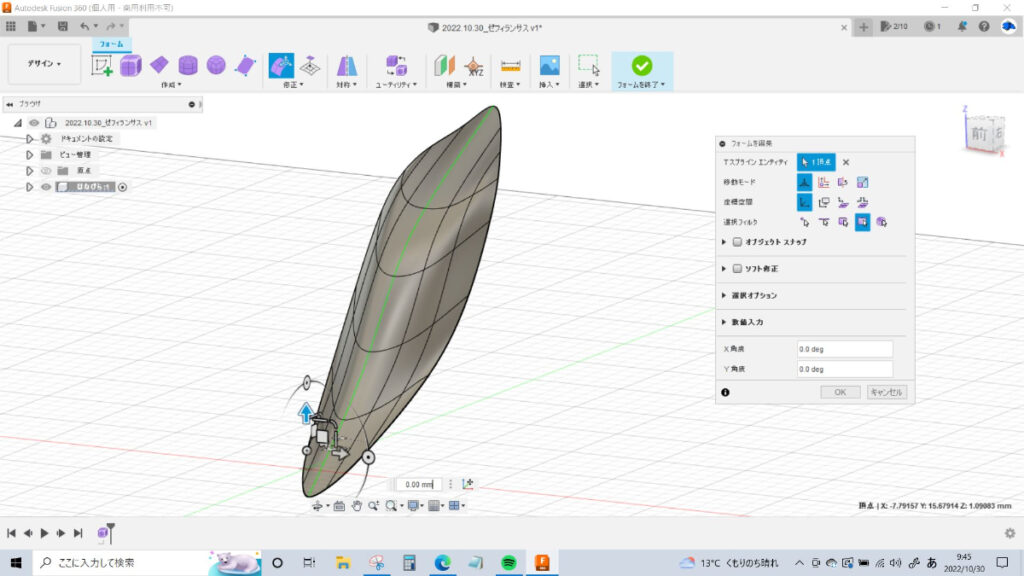
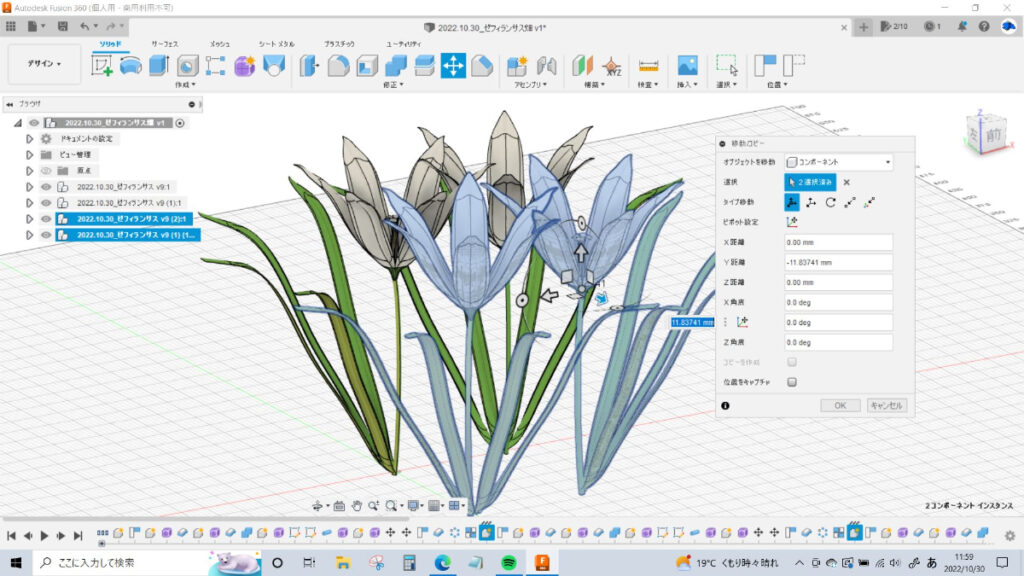
画像3枚目:再度増やしてみる。うん、気に入った。
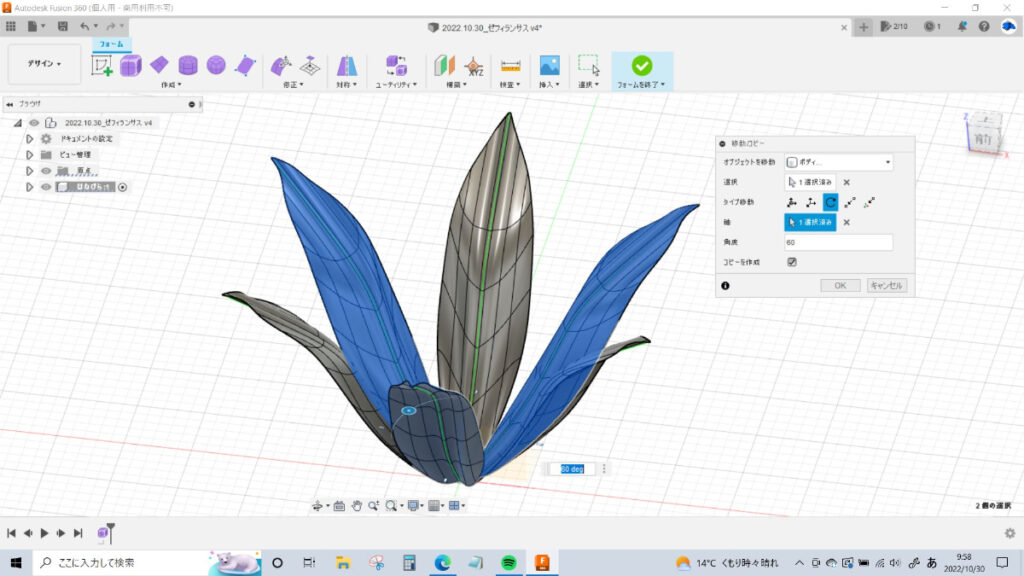
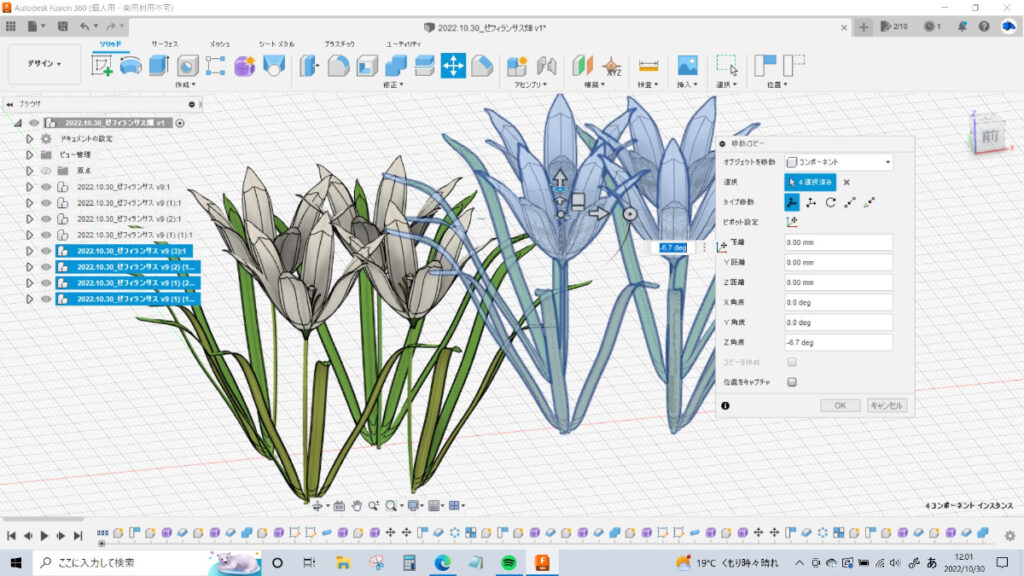
そして、今つくった3枚セットの花びらを「移動/コピー」の回転移動、
軸は原点を通るZ軸で、60°ずらしてコピーを作成します。
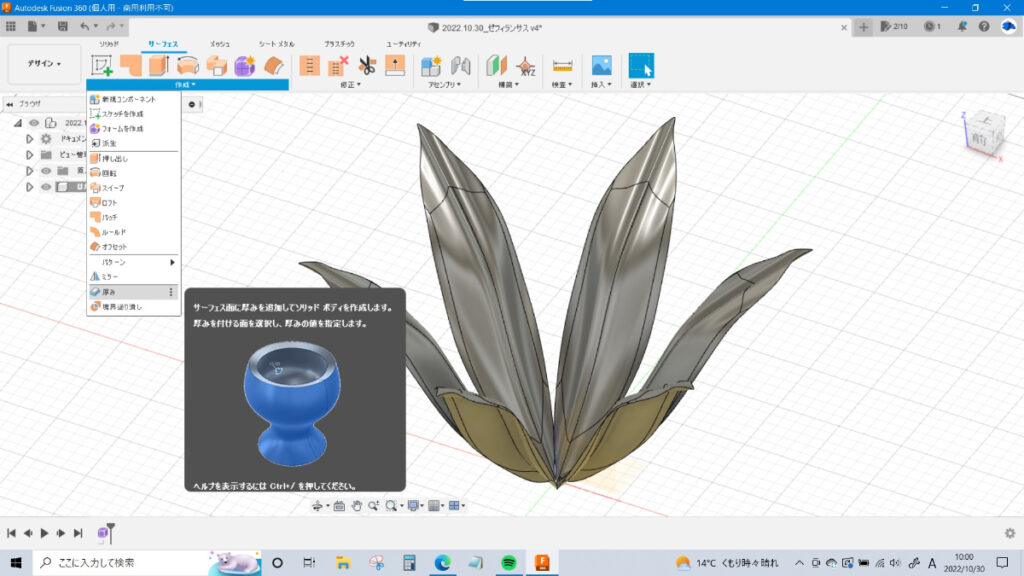
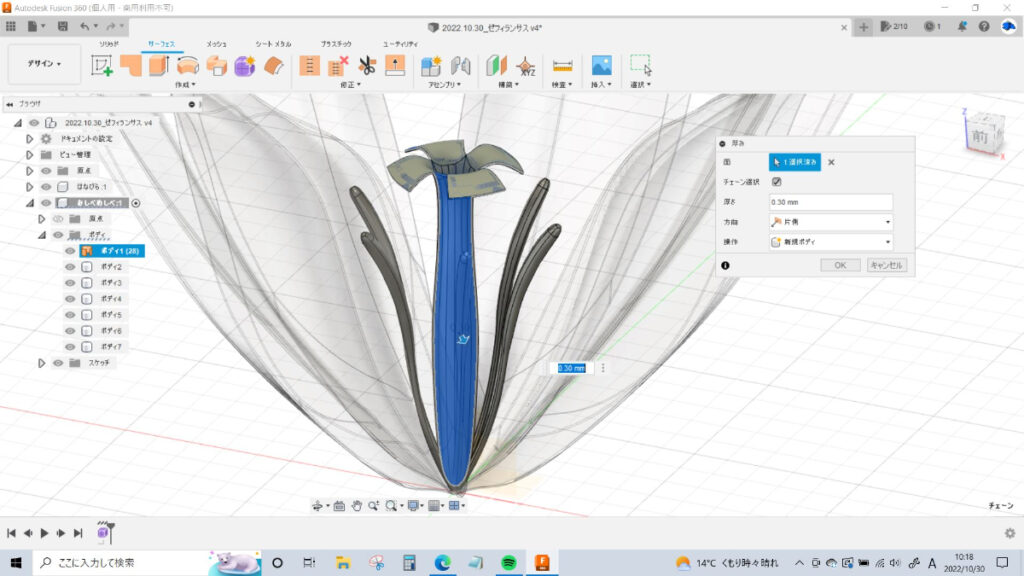
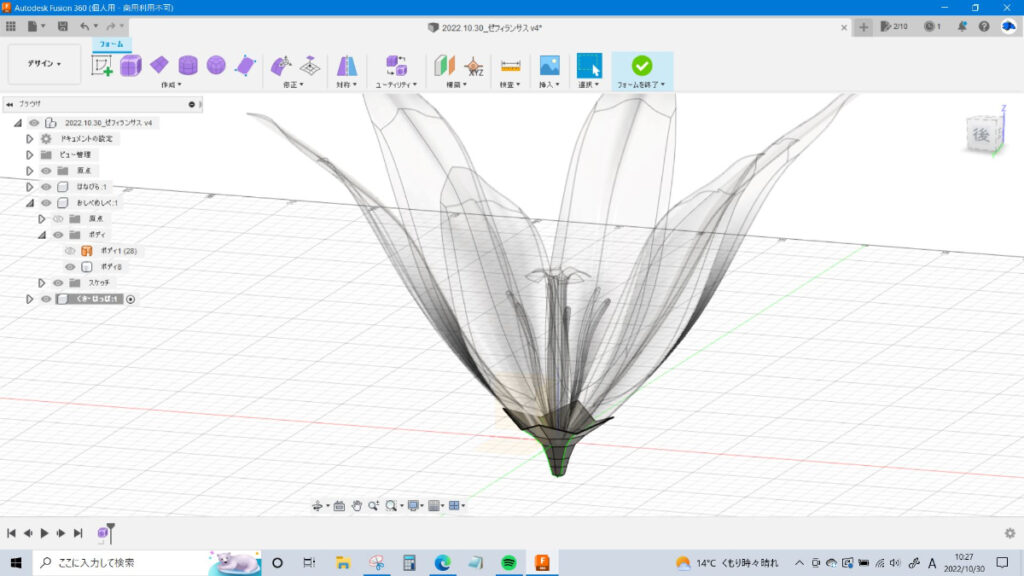
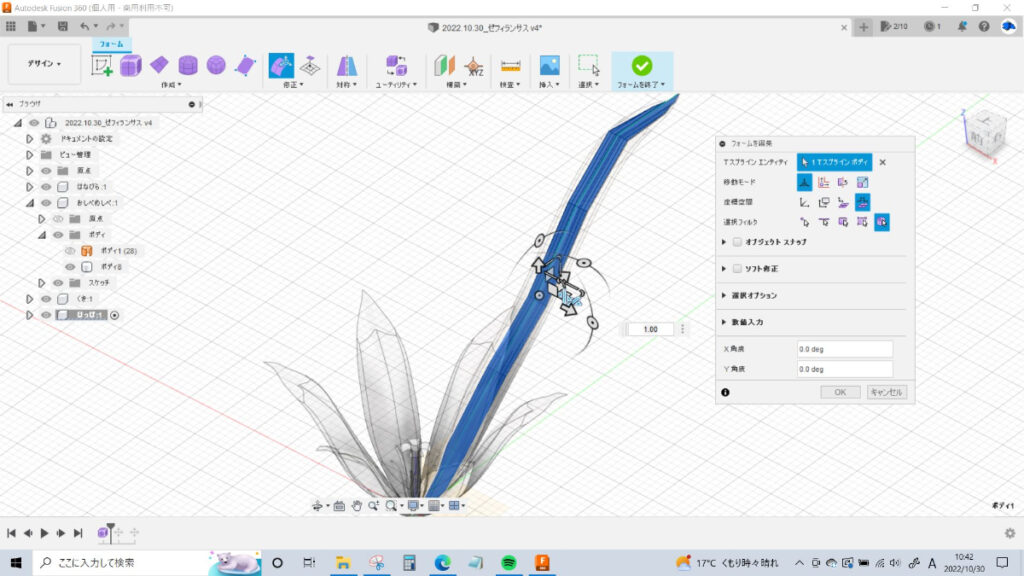
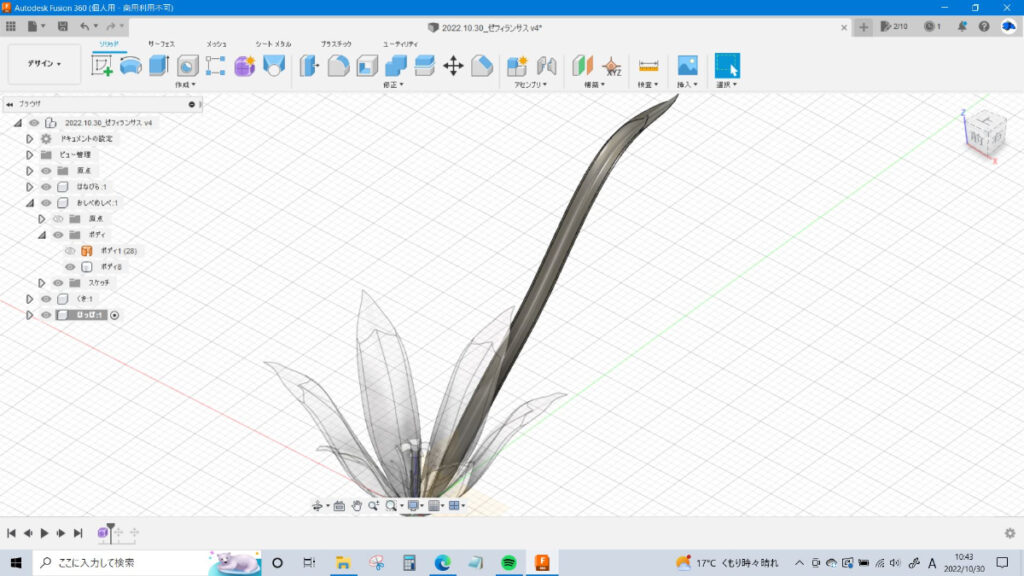
②-8 フォームを終了し、厚みを付ける
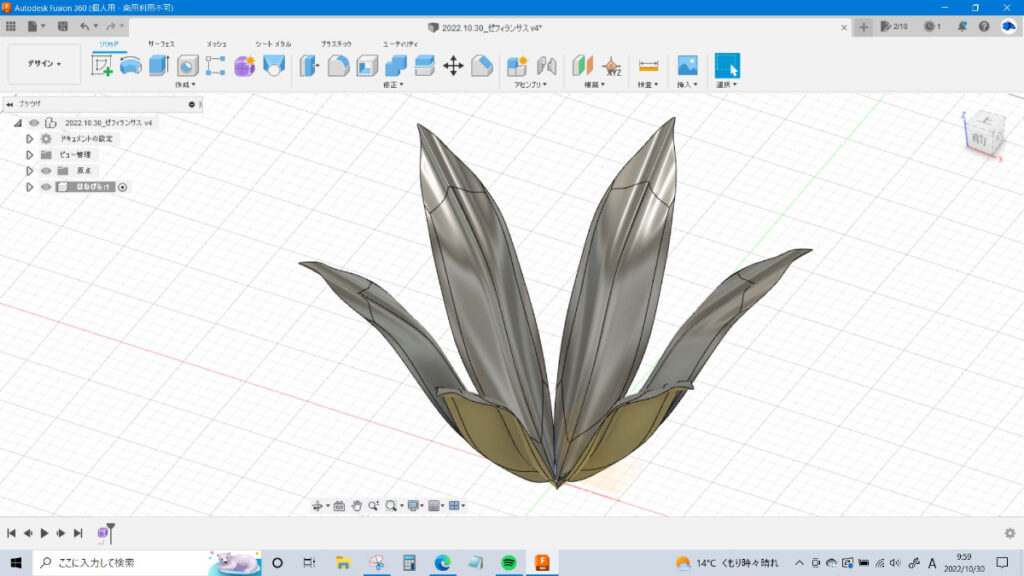
花びらの編集はいったん終了。
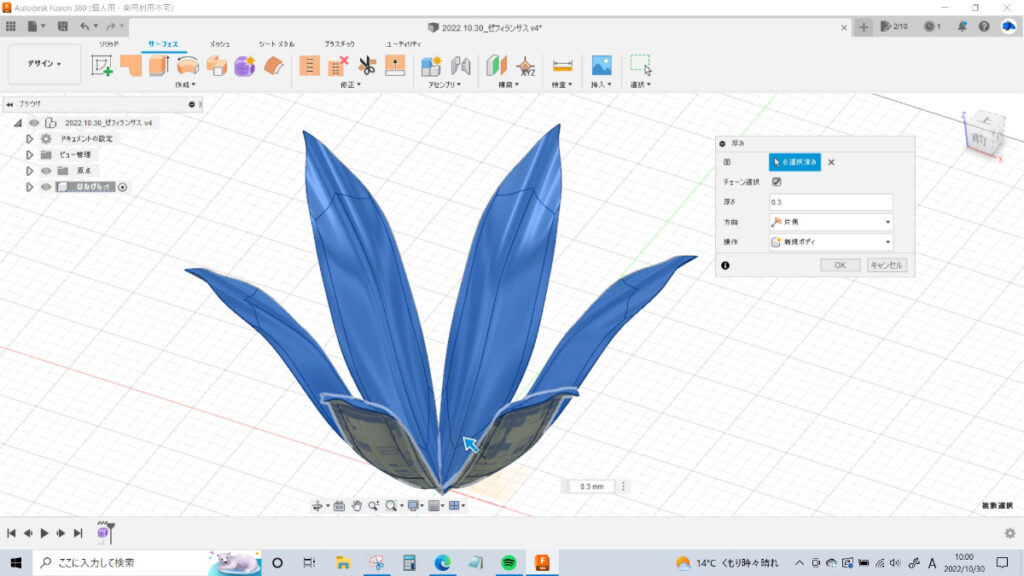
フォームを終了します。開放された面なので、厚さ0ミリの「サーフェス」状態になっているので
「サーフェス」メニューの作成タブ「厚み」でソリッド化します。
花びらの華奢な感じを出したいので0.3ミリくらいにしています。
これで花びら部分はいったん完成ということにします。
なんかこの時点で結構やり切った感があるのですが、
まだ終われないッ…!
③ おしべ・めしべー新規コンポーネントをつくる
スクショを撮り忘れましたが、新たなパーツ作成に移行するときは
新規コンポーネントにしておくとよいでしょう!
すべて同じコンポーネントにしてしまうと、後から「あ、ココ直したい」といったときに
どの履歴をいじればいいかわからなくなる&後工程でエラーが発生して大変なことになったりします。
それで何回泣いたことか…。
③-1 フォーム「円柱」でめしべをつくる

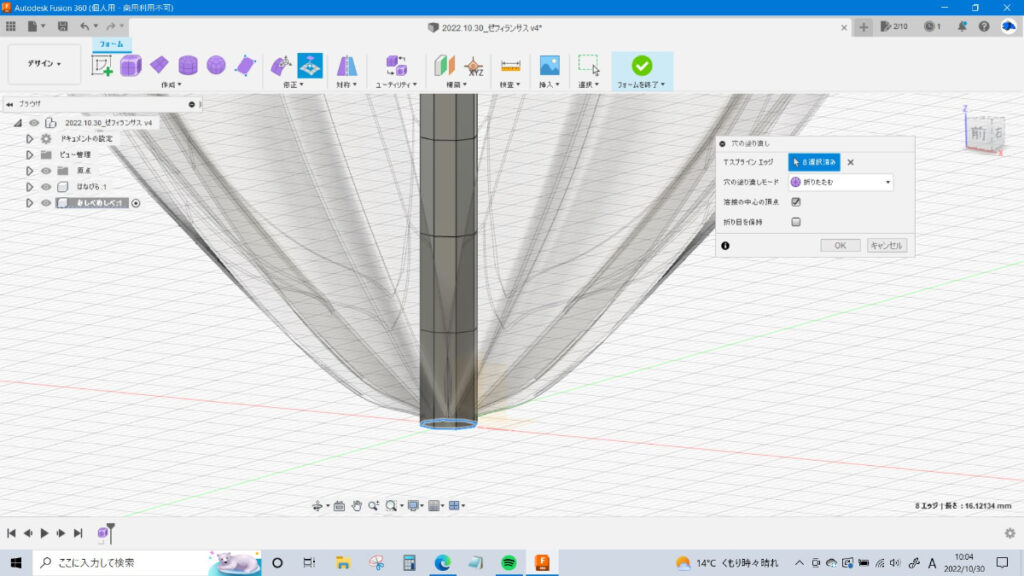

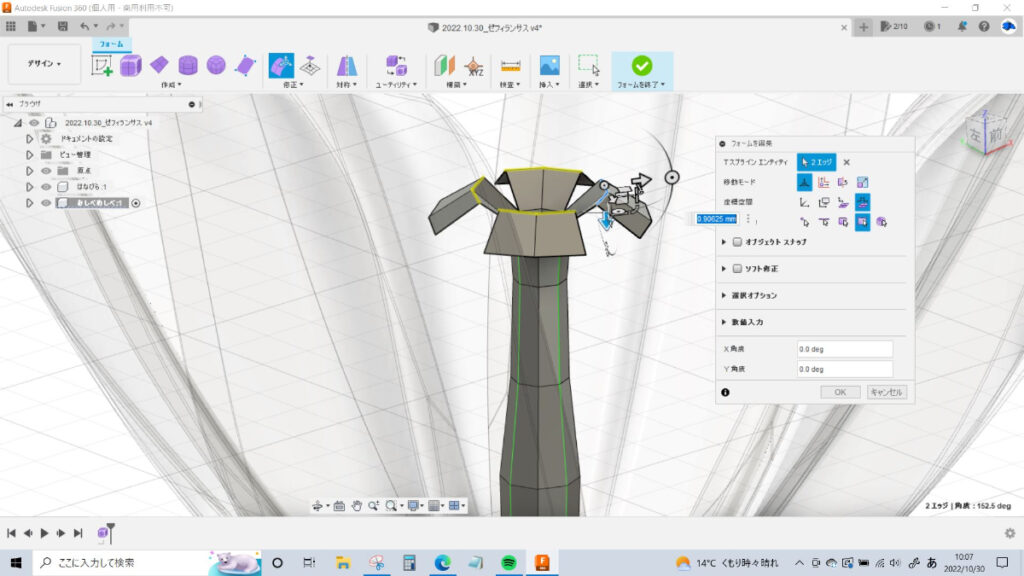
このお花のめしべは先端が3つに分かれている感じだったので、フォームの円柱(対象面は3)で、
先端を開かせて、途中の太さは写真を見ながらこちょこちょと広げたりすぼめたりしつつ
形状を調整していきます。根本は頂点の溶接で閉じています。
(先端が解放されているからサーフェスになっちゃうのでやらなくてもよさそうですが、なんとなく)
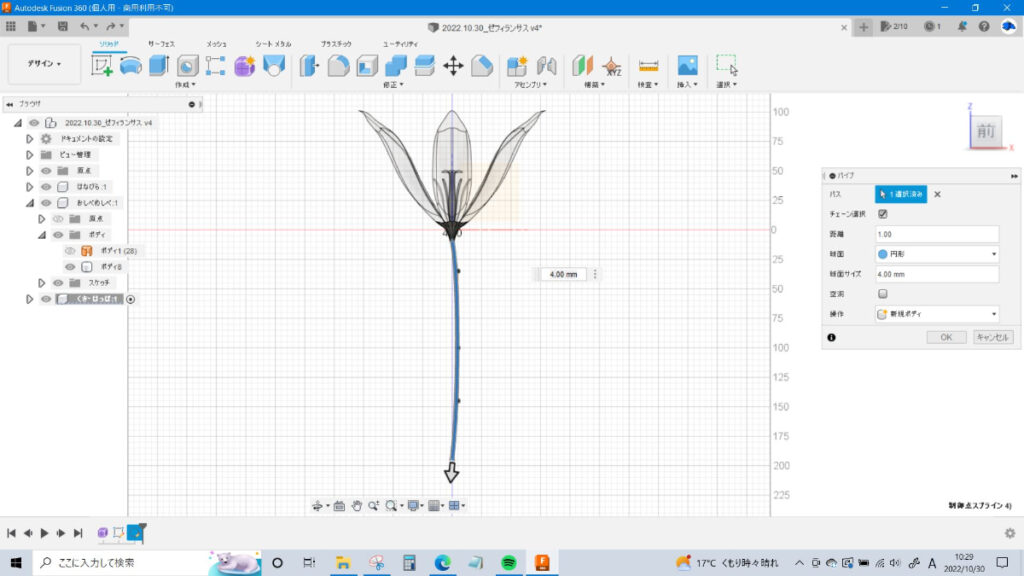
③-2 スケッチとパイプでおしべをつくる
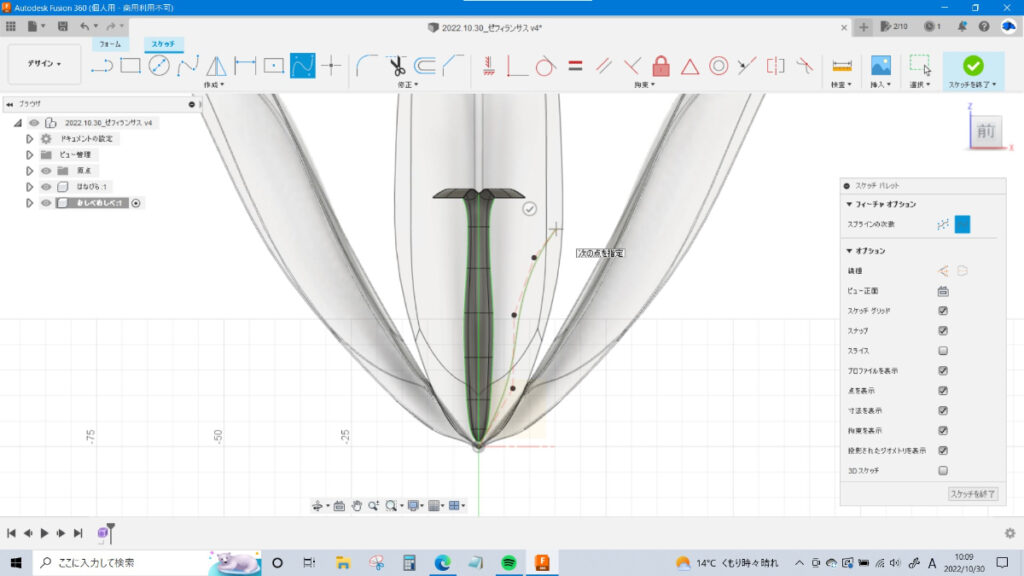
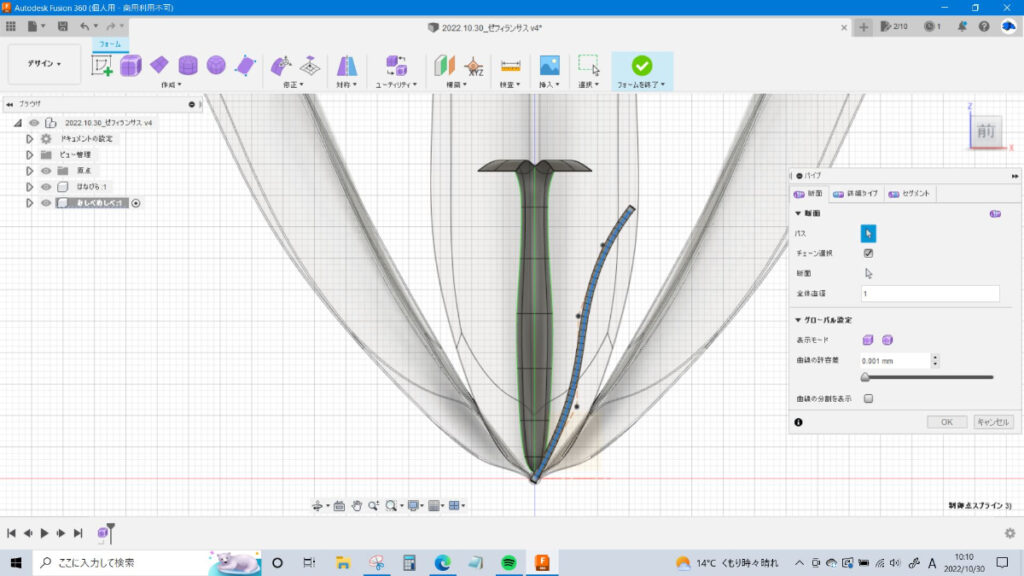

こんどはおしべを作ります。フォーム内のスケッチの「フィット点スプライン」か「制御点スプライン」で
おしべのだいたいのラインを作ります。わたしは「制御点」推しです。
後から制御点をいじり倒すより、一発で描いた方が
きれいにできるかなー
スケッチが描けたら作成の「パイプ」で筒状のフォームを作ります。
最初はごんぶとの筒が出てきてびっくりしますが、全体直径を操作して(今回は1ミリ)
おしべっぽいものをつくります。めしべとのバランスを見て太さを決めましょう。
先端側と根本側は「頂点の溶接」で閉じておきます。
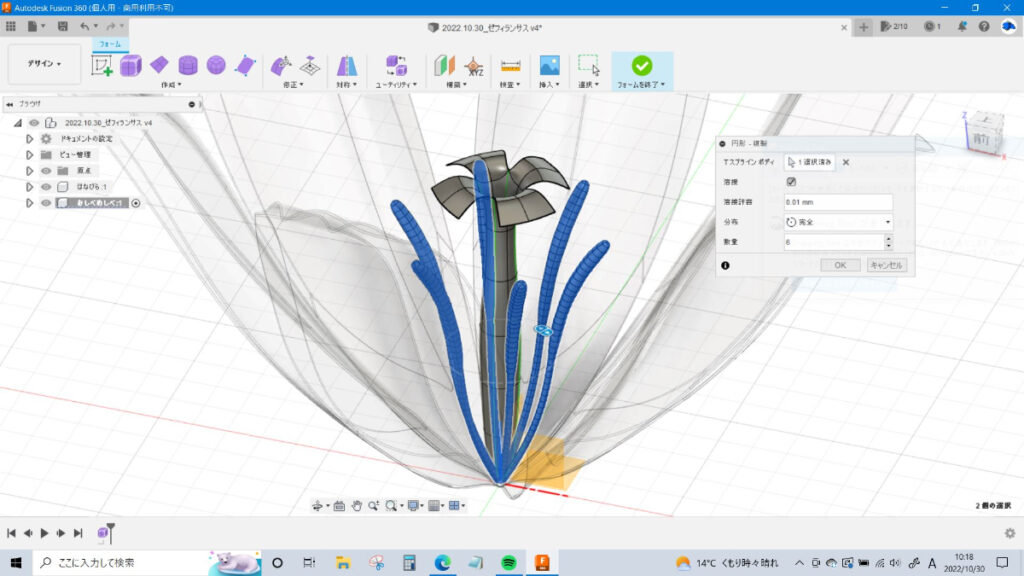
写真を見ながら太さを調整し、円形複製で数を増やします。
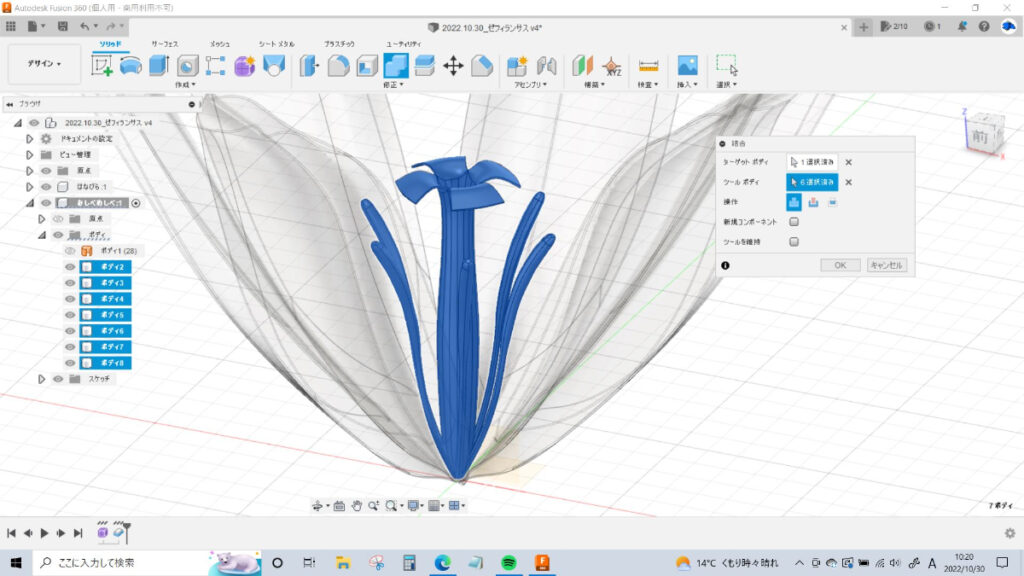
③-3 フォームを終了し、めしべに厚みを付けてパーツを結合する

めしべはフォームを終了した後花びらと同様の手順で厚みを付けておきます。
おしべは上下が閉じているので、自動でソリッドが作られています。
めしべとおしべは移動の時にバラバラになっちゃったりすると困るので、ソリッドの「結合」で
1つにしておきます。これでおしべ・めしべは一旦完成です。
しかしこの「結合」で
後からちょっとめんどくさいことになるのです…。
④ がく・くきー新規コンポーネントをつくる
がく(花びらの外側の、くきと接続している部分)とくきを作っていきます。
これも新規コンポーネントを作っておきましょう。
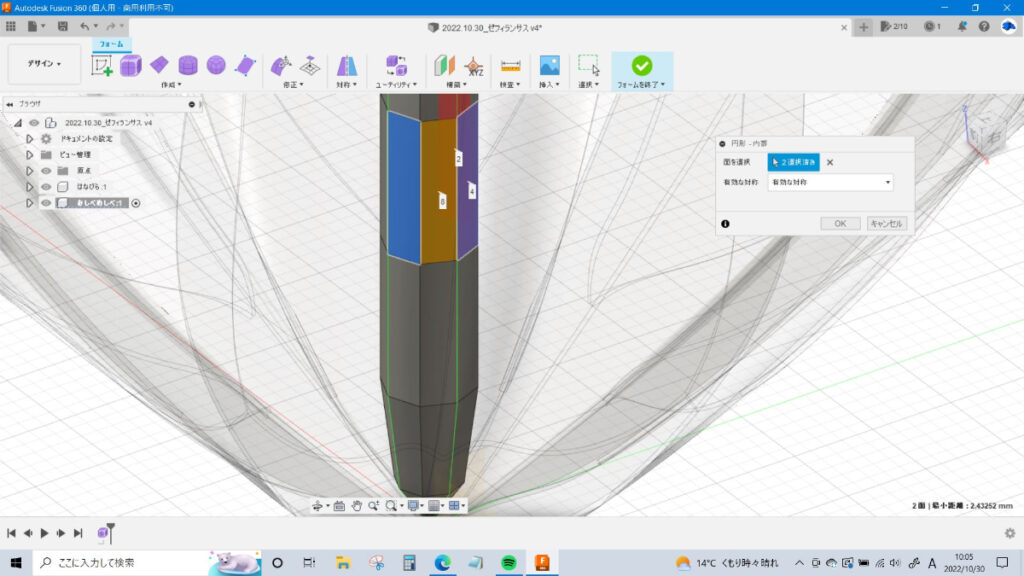
④-1 フォームの円柱でがくをつくる
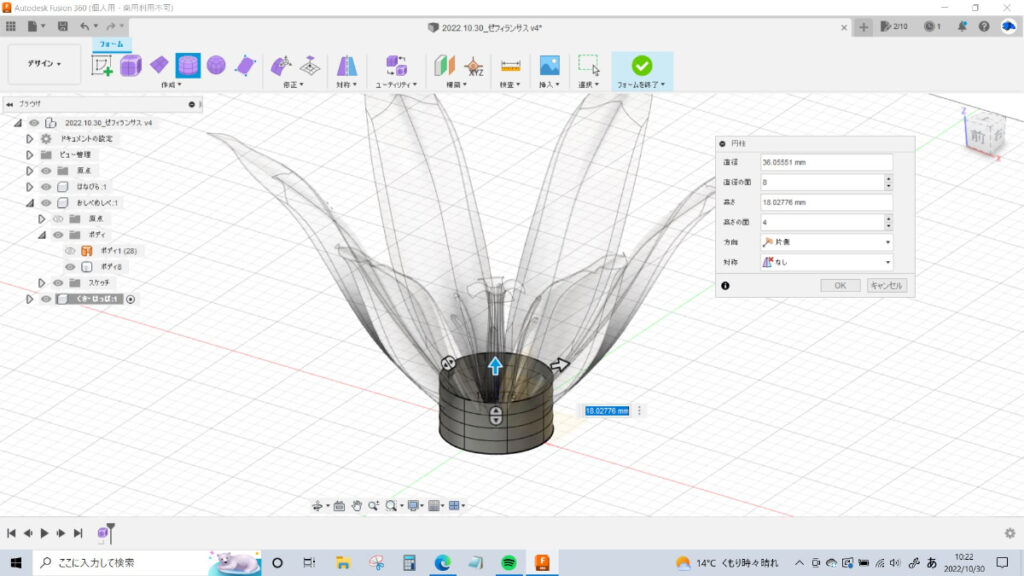
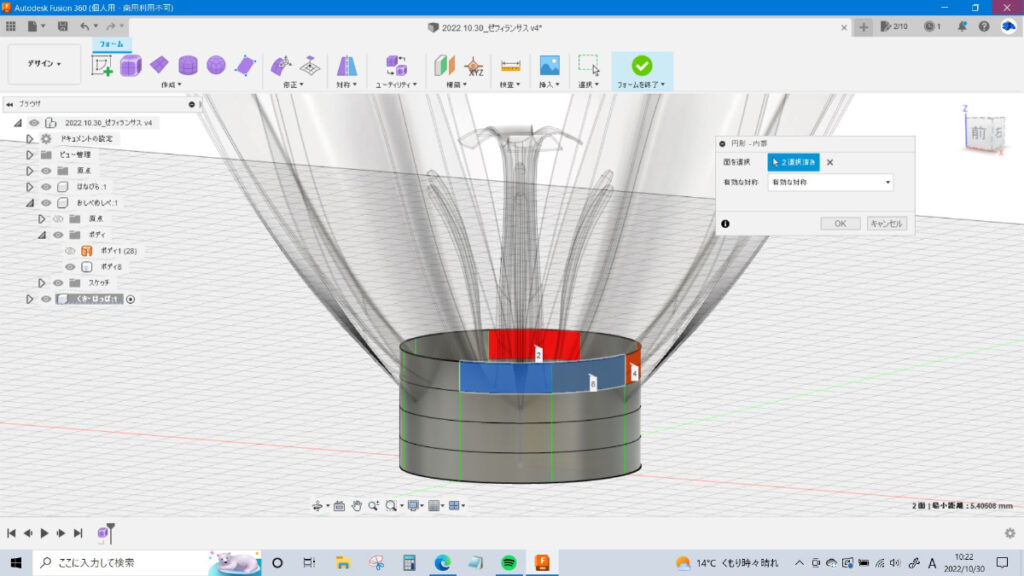

フォームの円柱でがくをつくります。ぎざぎざした感じにしたいので
円柱面の数は「8」対称は「4」にしないといけないのですが、対称も「8」にしてしまい、後から修正しています。
何度でもやり直せるさ!!(涙)
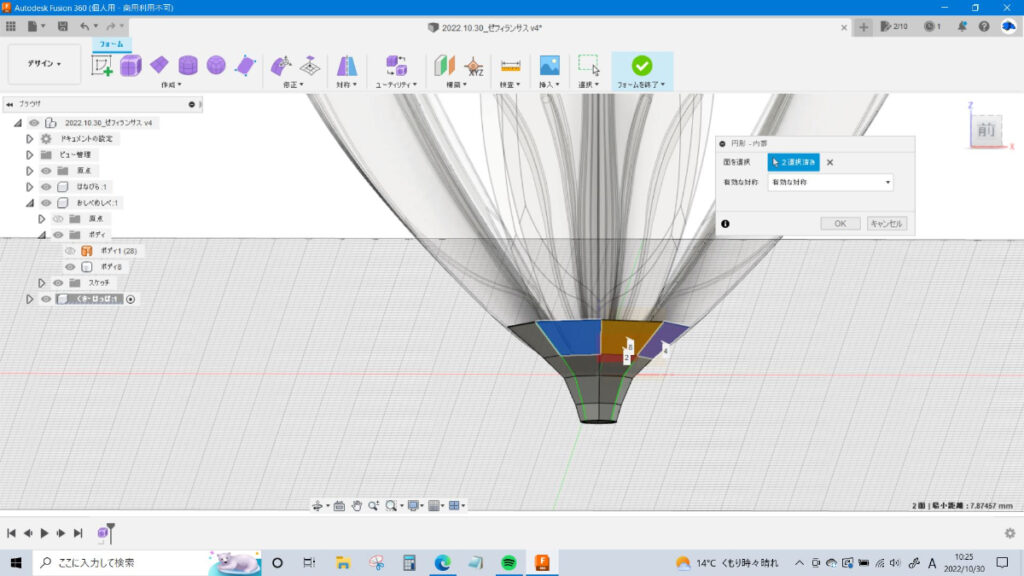
花びらに食い込みすぎず、離れすぎずのいい感じの形になるように調整し、下の部分は頂点の溶接で閉じておきます。
フォームを終了し、花びらやめしべと同様にサーフェスで厚みを付けておきます。
この辺になるとだいぶ疲れてきている
&目立たないのでそこそこに作ります。
④-2 ソリッドのスケッチとパイプでくきをつくる・結合

くきは途中で太さが変わらないので、ソリッドでスケッチ(おしべと同じく「フィット点スプライン」か
「制御点スプライン」)を描き、それをパスとしてパイプで作成します。
がくと結合しておきます。がくとくき、完成です。
くきが一番楽ちん!!!
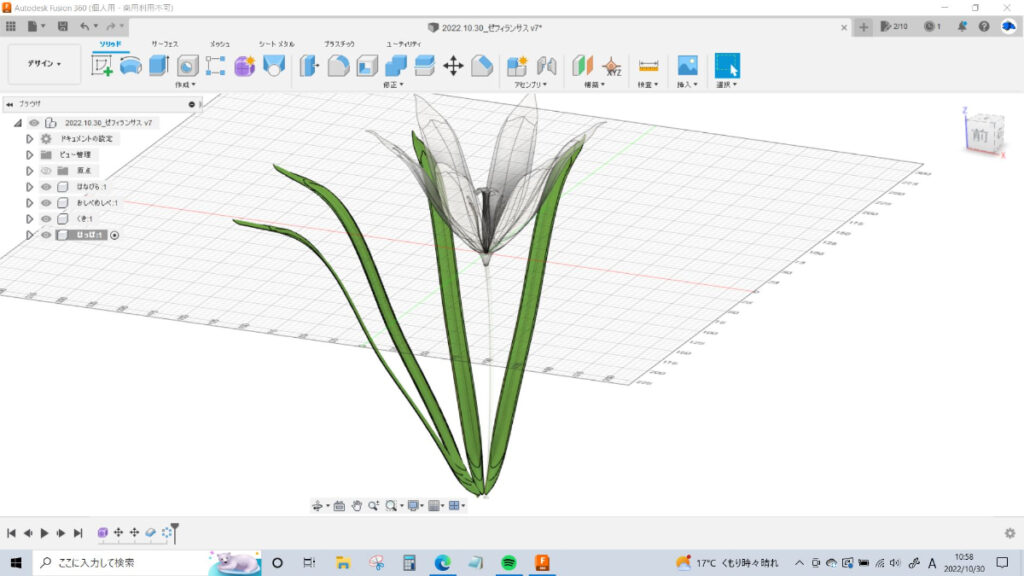
⑤ 葉っぱー新規コンポーネントをつくる
だいぶ疲れてきましたが、葉っぱをつくるので新規コンポーネントをつくっておきます。
あともうちょっと!!
⑤-1 フォームで平面をつくり、花びらと同様に形状をつくっていく

このお花の葉っぱは長細いので、縦方向への分割数を増やしておきます。
花びら同様につくっていきます、が、正直花びらほど目立たないのでそこそこでいきます!
作り終わったら、くきの位置に合わせて移動しておきます。
サーフェスで厚みを付けるのを忘れずに!
わたしは厚みを付けるのを忘れて後から修正しました。あるある。
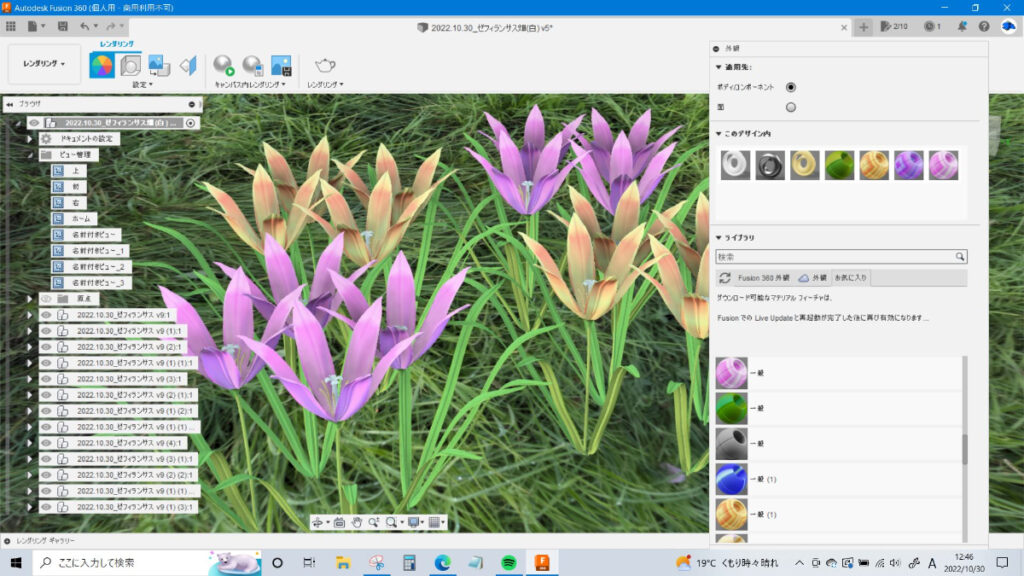
⑥ 外観を適用して色・質感を編集していく
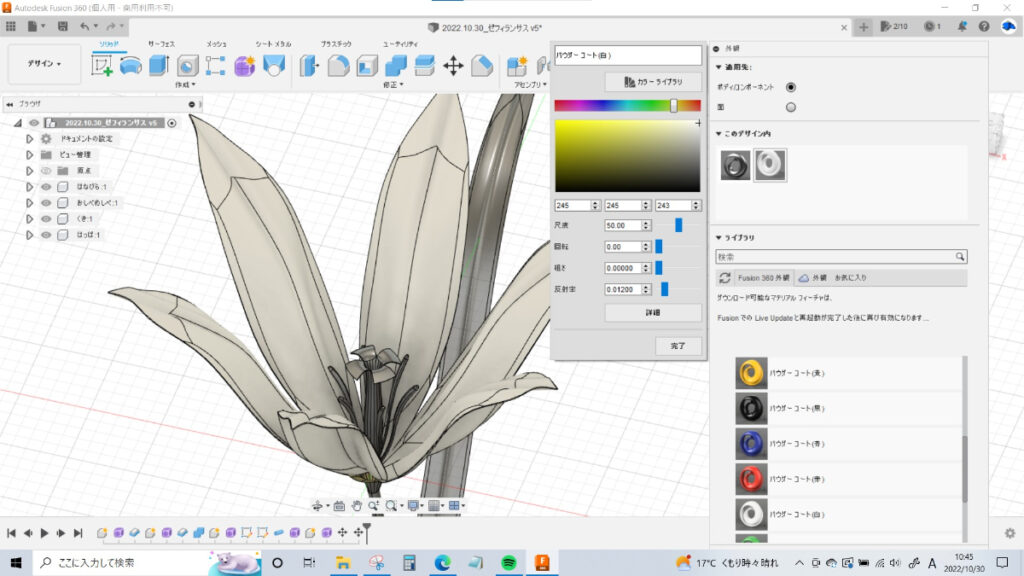
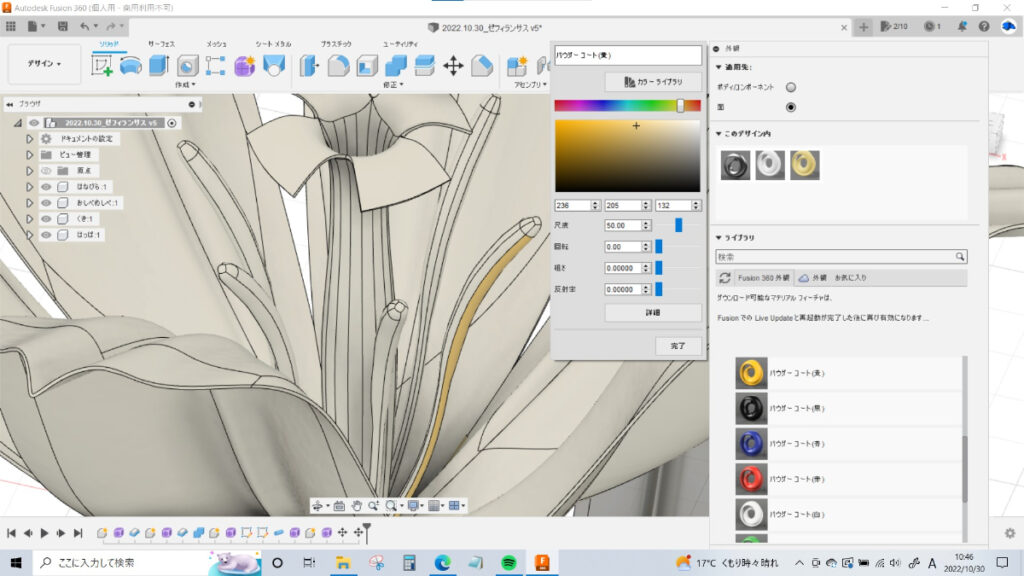
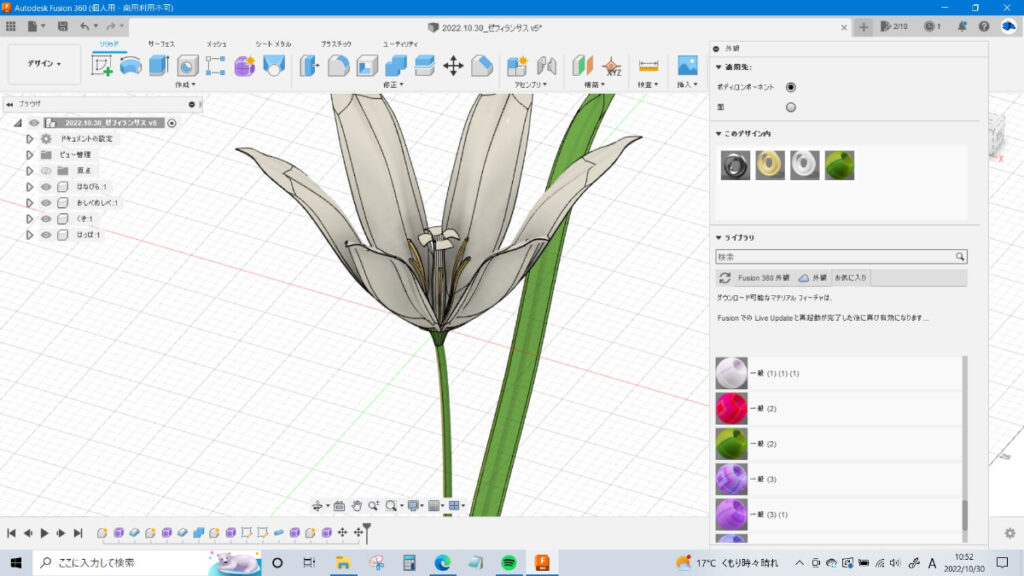
やっときました、外観の適用です。ここからもこだわりタイムです。
とにかく色々試してみて、好きなマテリアル・粗さ・透過率などなどを探っていきます。
後述のレンダリング画面での環境設定と併せて色々試してイメージに近づけていきます。
お気に入りの設定が見つかったらお気に入りに登録しておくといいですね。
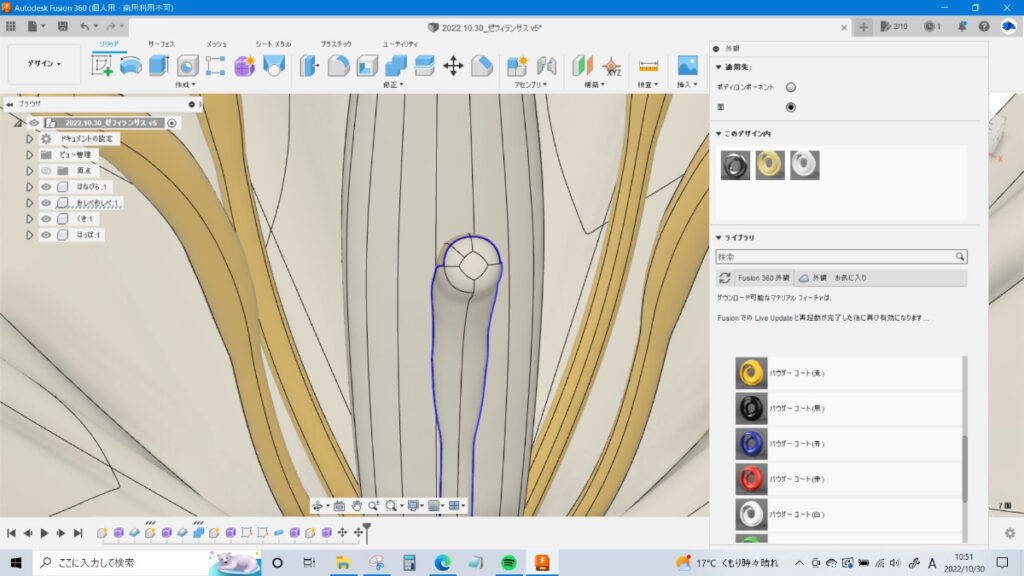
適用先の「ボディ/コンポーネント」「面」を切り替えて塗り分けていきます。
ここはもう、色々試して感覚をつかんでいくしかない!
めしべ製作パートで「結合したから面倒なことに…」と書いたのは
「おしべとめしべを1つのボディにしたために、面で塗り分けないといけなくなってしまった」ということです。
画像2枚目のように、一つ一つの面を選択して塗らないといけなくなりました…。
でもやはり1つのボディにしたかったので
必要な手順だと思ってガマン
⑦ 葉っぱを増やす

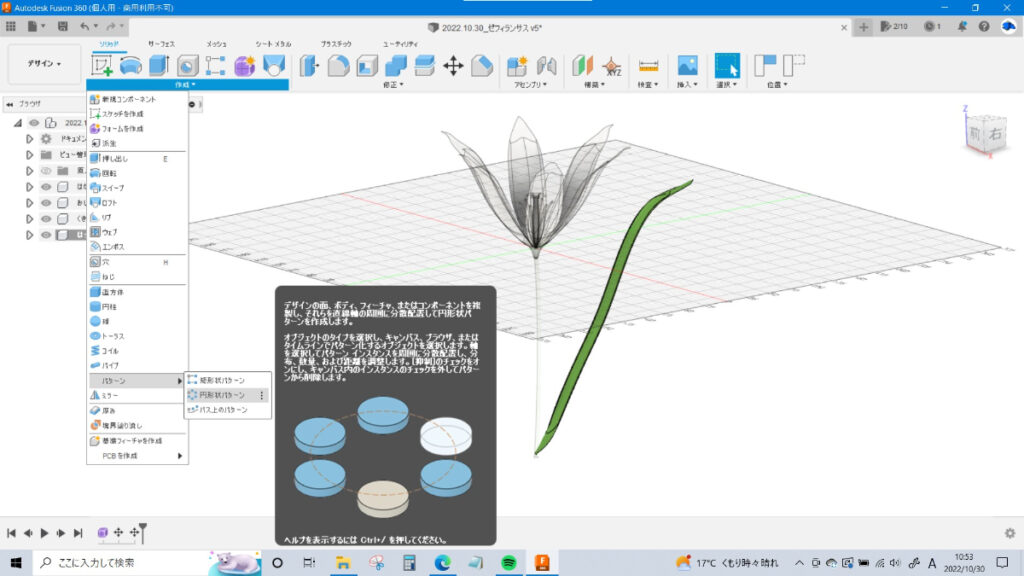
葉っぱにも外観を適用して色を塗ったので、円形状パターンで増やしていきます。
塗ってから増やす理由は、色がついた状態でコピーできるので塗る手間が省けるからです。
(コピーを先にすると、後で全部色塗りしないといけないので)
全周にコピーしちゃうと、お花を大量コピーするときに干渉するので円形状コピーの際に
「部分」で角度を指定して、その範囲内にコピーするかを決めて実行します。
今回は「120°の範囲内に4枚(=コピーを3つ増やす)にする」という指定にしました。
⑧アセンブリを設定する
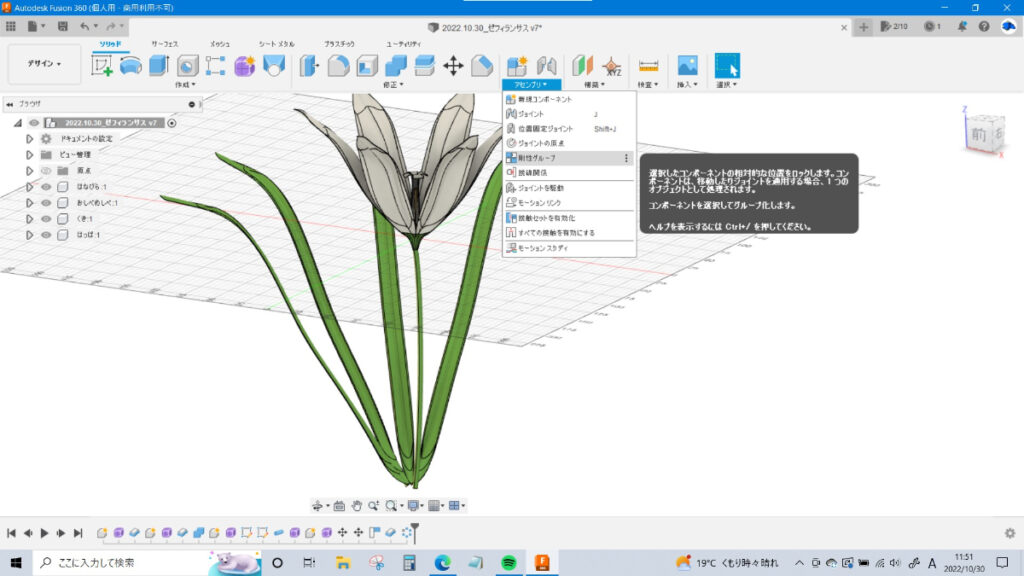

今の時点では「花びら」「おしべ・めしべ」「がく・くき」「葉っぱ」がそれぞれのコンポーネントで独立していて
ばらばらに動く状態になっていますので、それぞれの相対的位置関係を固定します。
ソリッドのアセンブリから「剛性グループ」を選び、固定したいコンポーネント(今回は上記の全て)を選択します。
これで、どれか一つを動かしても全部一緒にくっついてきます。
アセンブリを設定できるのはコンポーネント同士だけなので
注意が必要です(ボディには設定できないのです)
これで、お花は完成です!!
一旦お疲れさまでした!!!
ひとまず保存してプロジェクトを閉じましょう。
ここからが「作品づくり」です
⑨新規ファイルを作成し、先ほどのお花を挿入してリンクを解除しておく
おい!!終わったんじゃないんかよ!!!
と思いきや、ここからが作品として仕上げていくパートです。
ここからは!楽しいから!!(ある意味コダワリ沼のはじまりですが…)
さきほどのお花は、また今度パーツとして使うかもしれないので保存しておきましょう。
作品としての新規にファイルを作成し、それに先ほどのお花を挿入します。
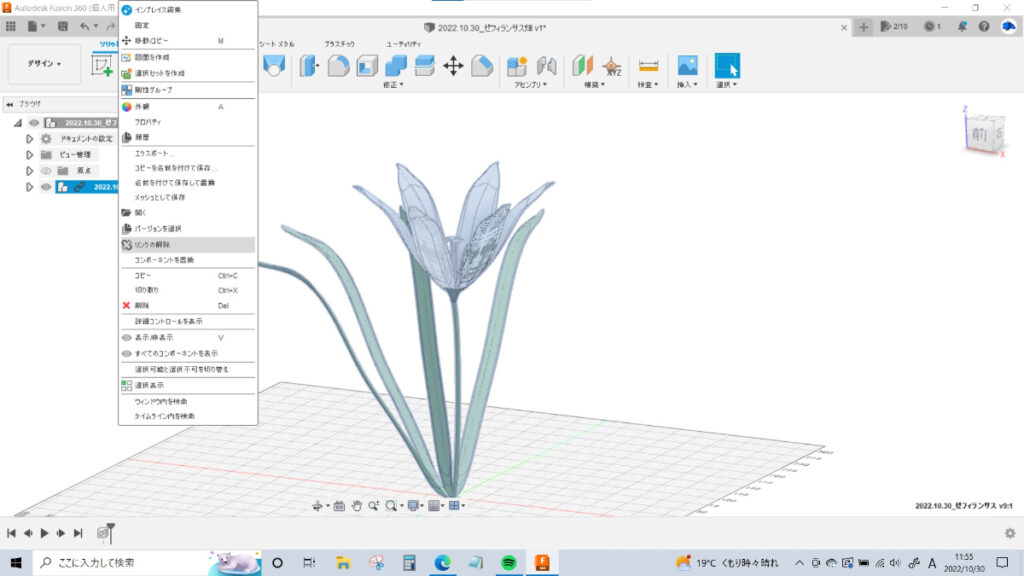
お花自体には変更をかけたくないので、右クリックメニューから「リンクの解除」を選択します。
コンポーネント名に表示されていた鎖のマークがなくなればOKです。
⑪コピ→コピーを貼り付けで増やす
一輪だけだと寂しいので、お友達を増やしましょう。
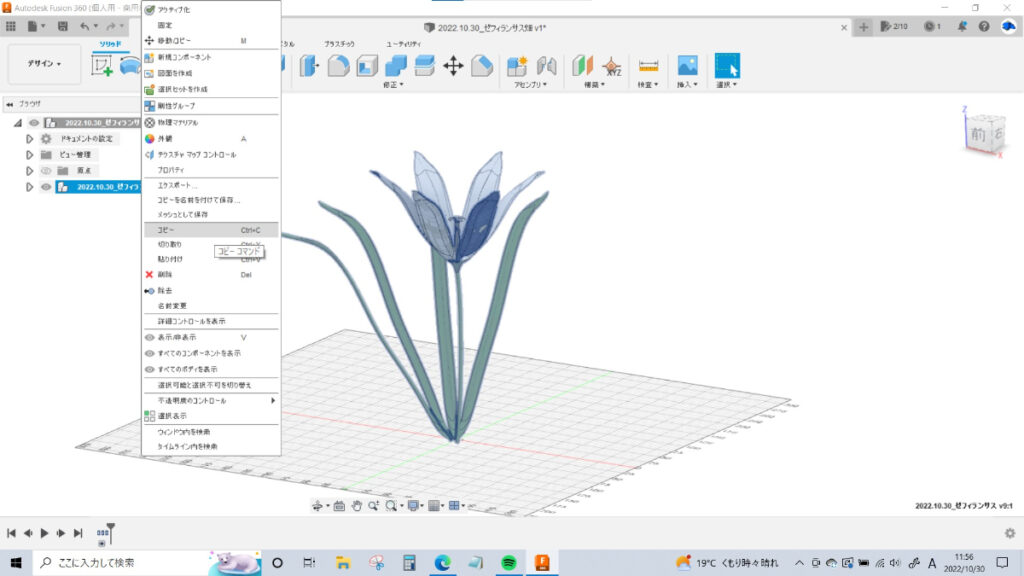
コンポーネント名を右クリックして「コピー」を選択、
最上位の(アクティブになっている)コンポーネントを選んだ状態で右クリックして「コピーを貼り付け」を選び、
互いに干渉しない位置関係に置きます。後から移動できるので気軽に置いて構いません。
ここで「コピ→コピーを貼り付け」で増やすのは、後でお花の色を変えるためです。
増やし方を間違えるとすべてのコンポーネントの色が統一されてしまい、
色変えができない場合があるので注意が必要です。
はじめはコピーの仕方を間違えて色変えできず
泣いたこと多数…。
⑪さらにいっぱい増やす
先ほどのコピーと同様の手順でお花をひたすら増やします。複数のコンポーネントを選択して増やすことができるので
手間はそんなにかかりませんが、増やせば増やすほどPCが重くなる(レンダリングにも時間がかかる)ので
ほどほどにしておきましょう。
外観を適用する前に増やしちゃうと、全部別々で色を塗らないと
いけなくなるので、必ず塗ってから増やしましょうね
(もちろん泣いたこと多数)
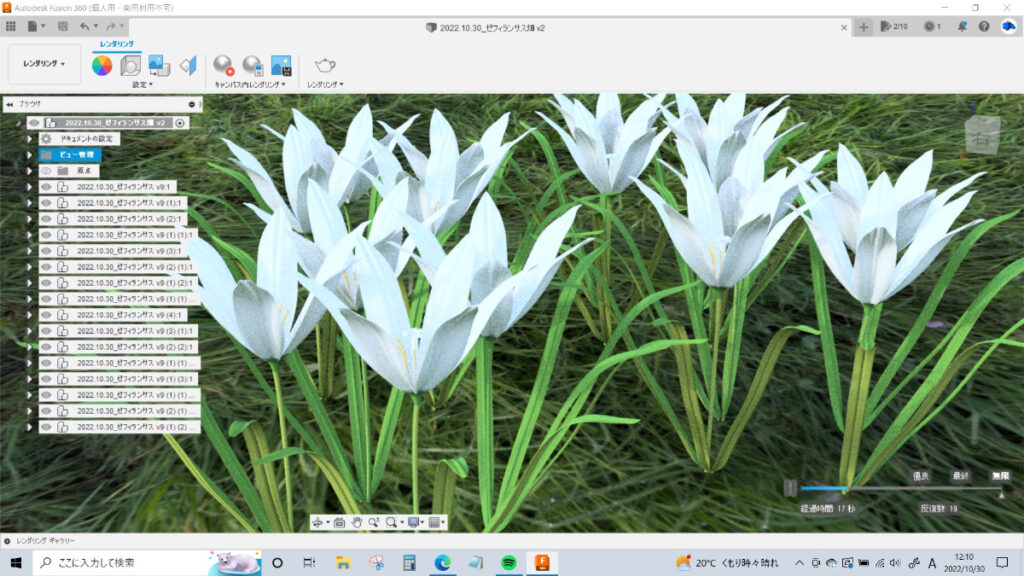
⑫レンダリング画面に移行し、環境を適用し、必要なら外観を再度調整する

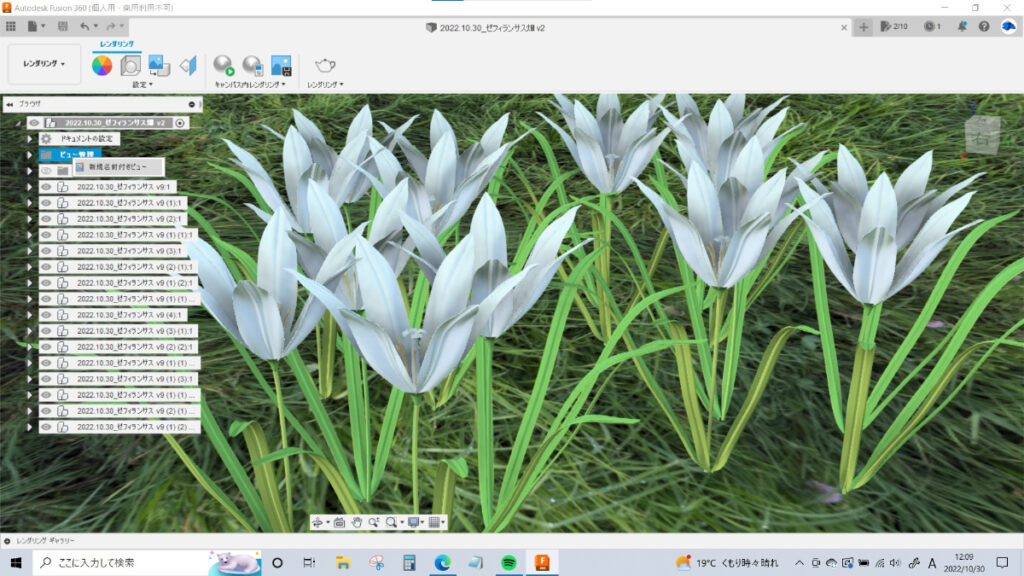
やってきましたコダワリポイント…いくつめ?
画面左上の「デザイン」を「レンダリング」に切り替え、環境を適用していきます。
Fusion360に入っている環境や、HDRI画像を配信しているサイトから入手した背景を適用していきます。
(今回はフリーのHDRI画像を配信しているサイトから頂いた背景を適用しています)
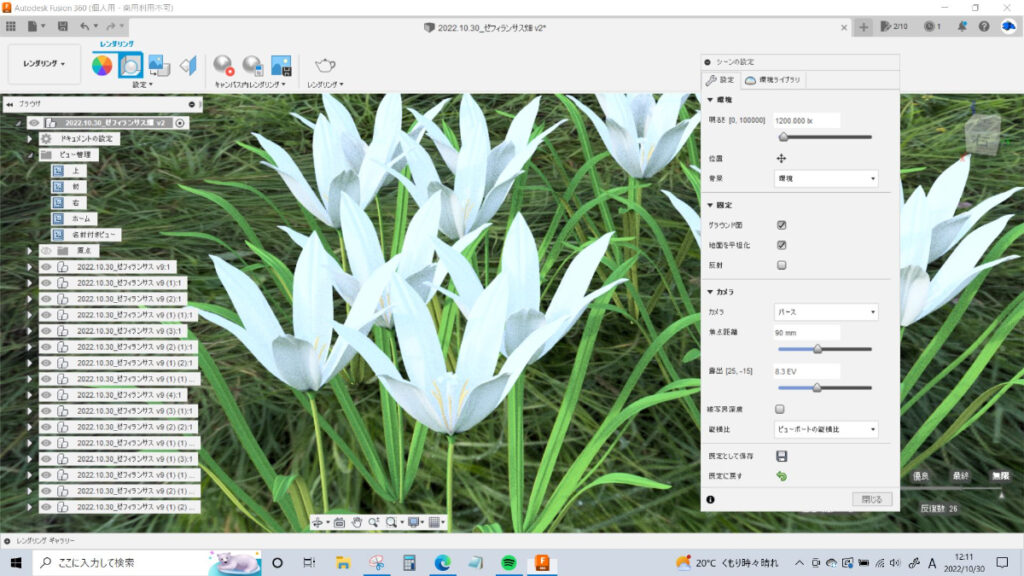
地面から生えていてほしいので「グラウンド面」「地面を平坦化」にチェックを入れます。(そうしないと宙に浮きます)
「位置」で背景に対してお花たちを配置する位置を調整し「明るさ」「露出」や、今回は設定していませんが
「被写界深度」などを調整していきます。(被写界深度とは、簡単にいうと焦点を決めて、周りをぼかす処理です)
このあたりは詳しくはグーグル先生に聞いてみてください…!
(わたしも素人なので)
キャンパス内レンダリングで照明の具合などを確認しつつ、必要があれば外観で質感を再調整します。
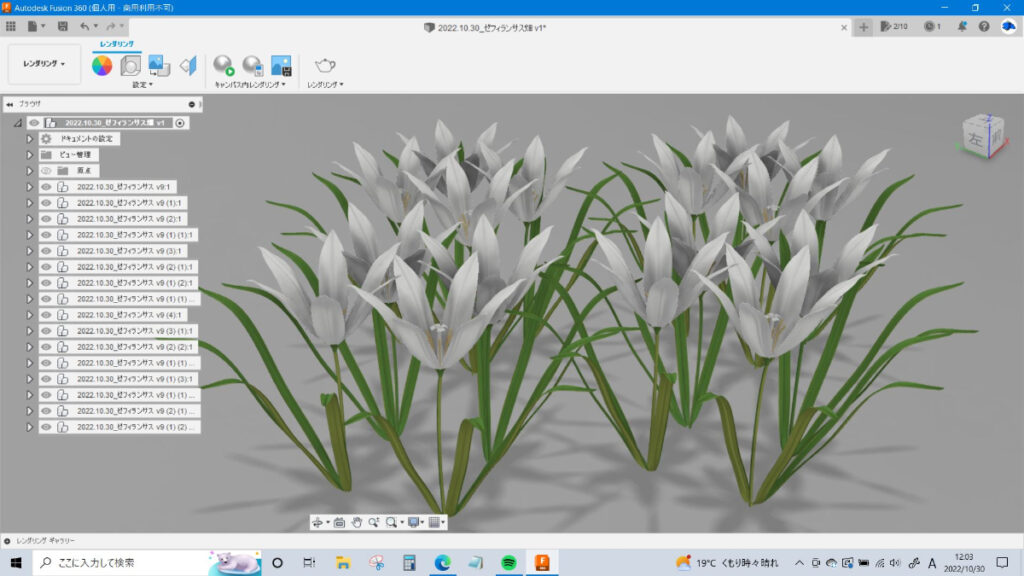
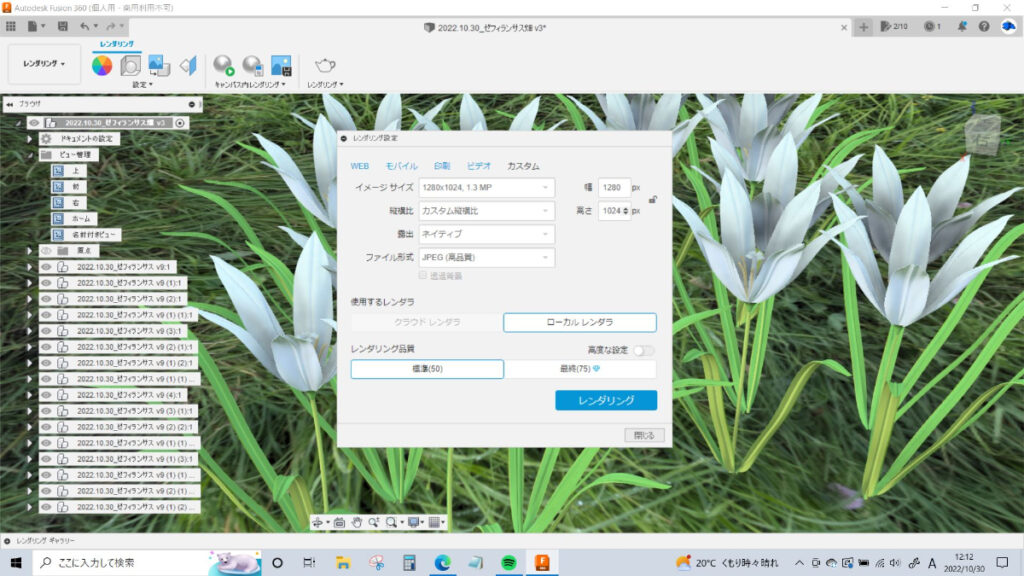
⑬お好みのレンダリング方法で画像を作成する(今回はローカル)
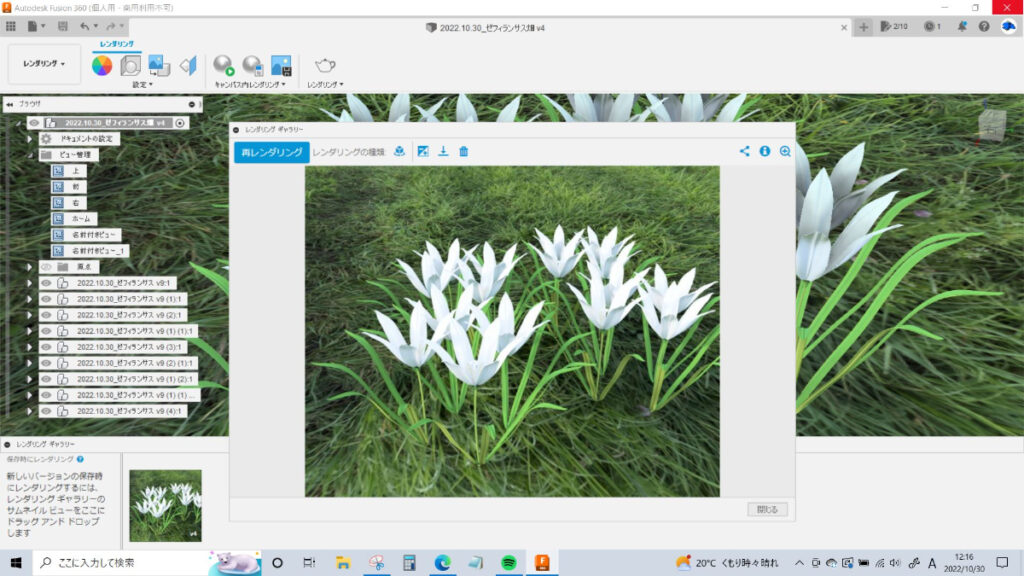
わたしは今までずっと「キャンパス内レンダリング」を使っていたのですが、
うっかり視点を変えてしまったりするとやり直しになったり、透過素材が多かったりすると数時間かかったり…。
ツイッターで「ローカルレンダリング便利だよ!」と教えてもらい、近頃はそちらを使っています。
画像サイズ・ファイル形式をお好みで選択し、レンダリング品質を選択します。
「最終」はクレジットが必要なので、富豪の方はそちらを選んで頂いてもOKです!
わたしは平民なので「標準」を選びます。
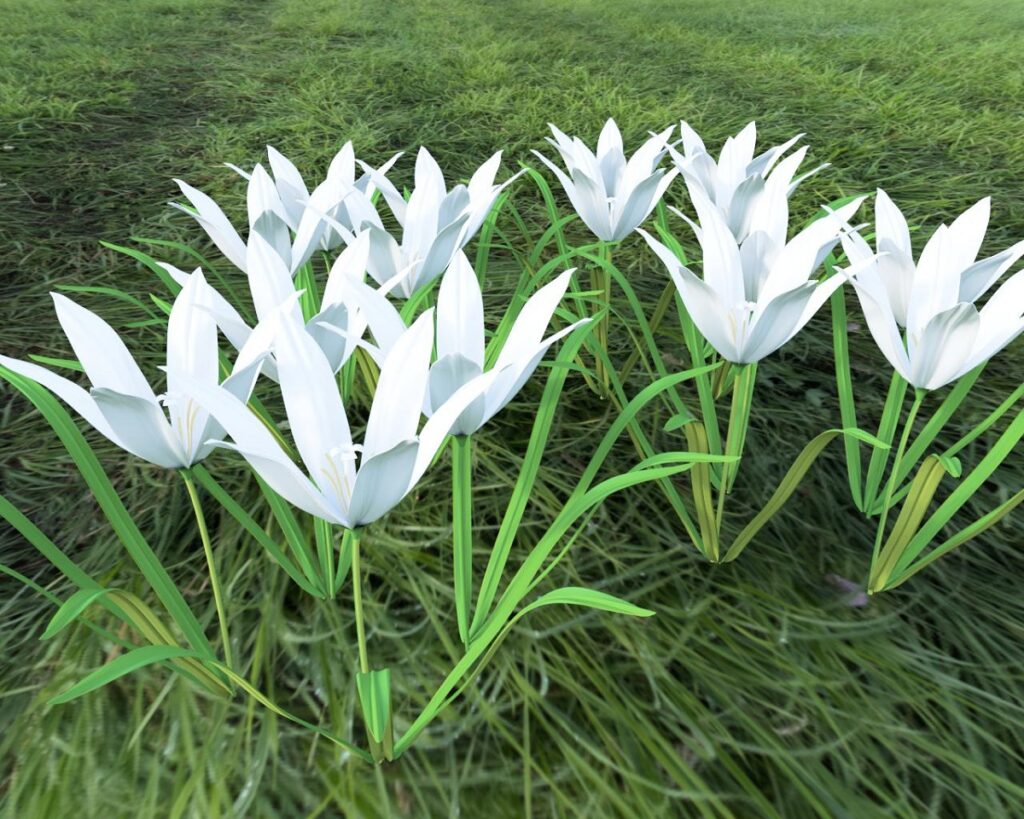
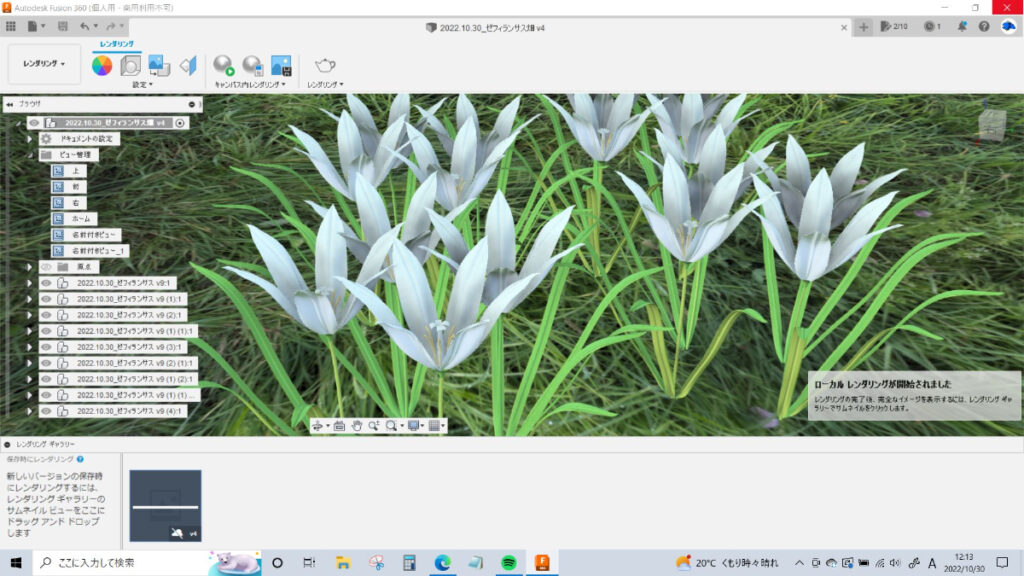
じゅうぶんきれい!!不満なしです!!!
キャンパス内レンダリングで数時間かけたものと遜色ない画像が
数分で出てくる…すごい。
レンダリングギャラリーに画像が入ってくるので、気に入ったら保存しましょう。
ちょっとちがうな、という場合は調整して再度レンダリングします。
【おまけ】色変えバージョン作成・グラデーションの作り方(動画紹介)
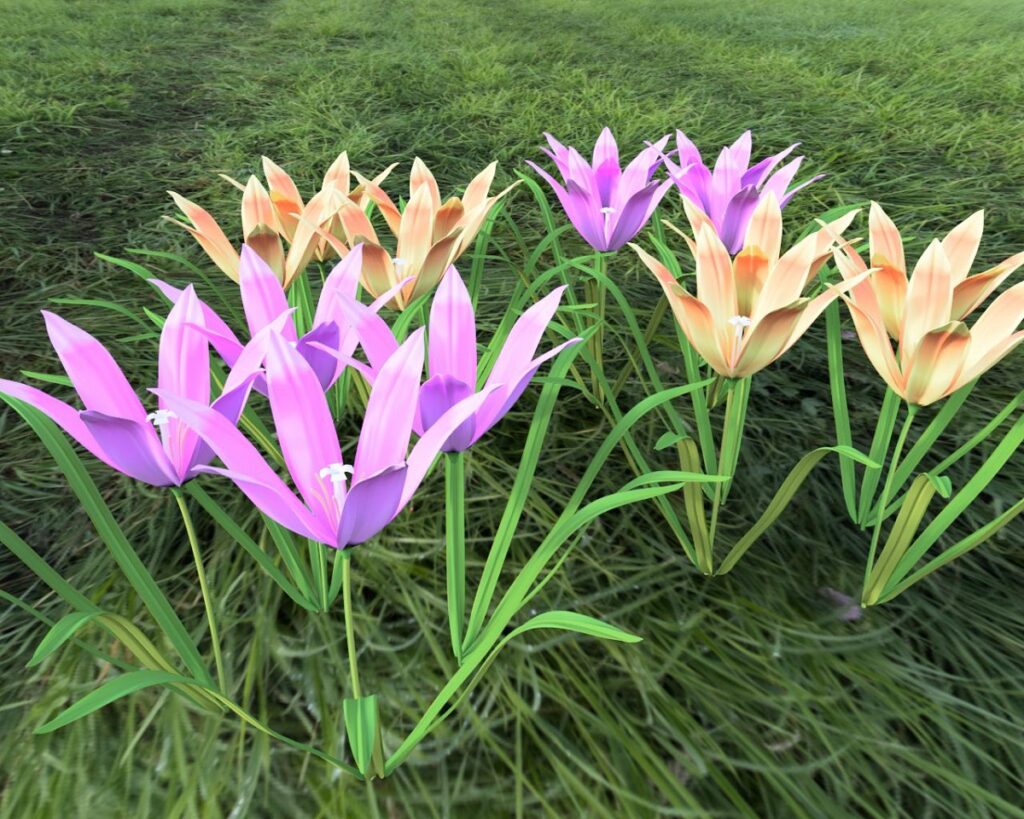
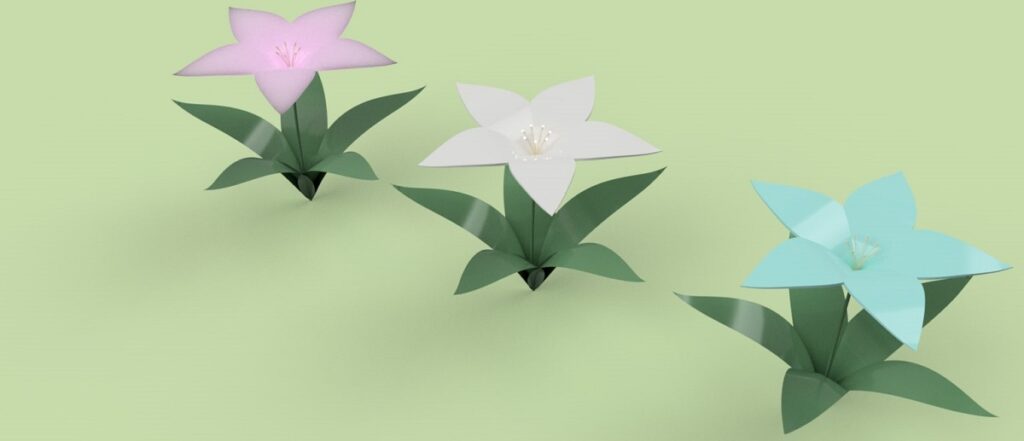
ゼフィランサスは白以外にもピンクや黄色があるようです。全部かわいい。
ということで、別バージョンも作ってみます。
以前作った「ピンクのグラデーション」「黄色のグラデーション」のパターンを残していたので、それを適用。
おぉ、なかなかいい感じ。グラデーションの作り方はこちらの動画がわかりやすいです!
「なほさん」が紹介してくれた方法を「イジュさん」が動画で解説してくれています。
お二人の記事や動画、めちゃくちゃ勉強になるのでいつも見させてもらっています!!
まとめ
いつか紹介したいと思っていた「お花のつくりかた」の記事をやっと書くことができました。
大ボリューム&Fusion360を使っている方にしか伝わりづらい記事になってしまいましたが
「1年ぐらいやっていたら、初心者でも色々できるようになるんだなぁ」と思ってもらえると嬉しいです。
お花だけでなく、色々なものを作って紹介していきたいです
ここまで読んでくださった方、長いのに本当にありがとうございました!!
いままでの作品やツイッターも見てもらえると嬉しいです。
おすすめ参考書・講座などのご紹介


コメント